ZenMux Setup
Configure ZenMux in Chatbox with an OpenAI-compatible endpoint, a provider-qualified model ID, and the correct model limits.
Add the Provider
- Open Settings → Model Provider → Add.
- Select Add Custom Provider.
- Use
ZenMuxas the name and select OpenAI API Compatible.
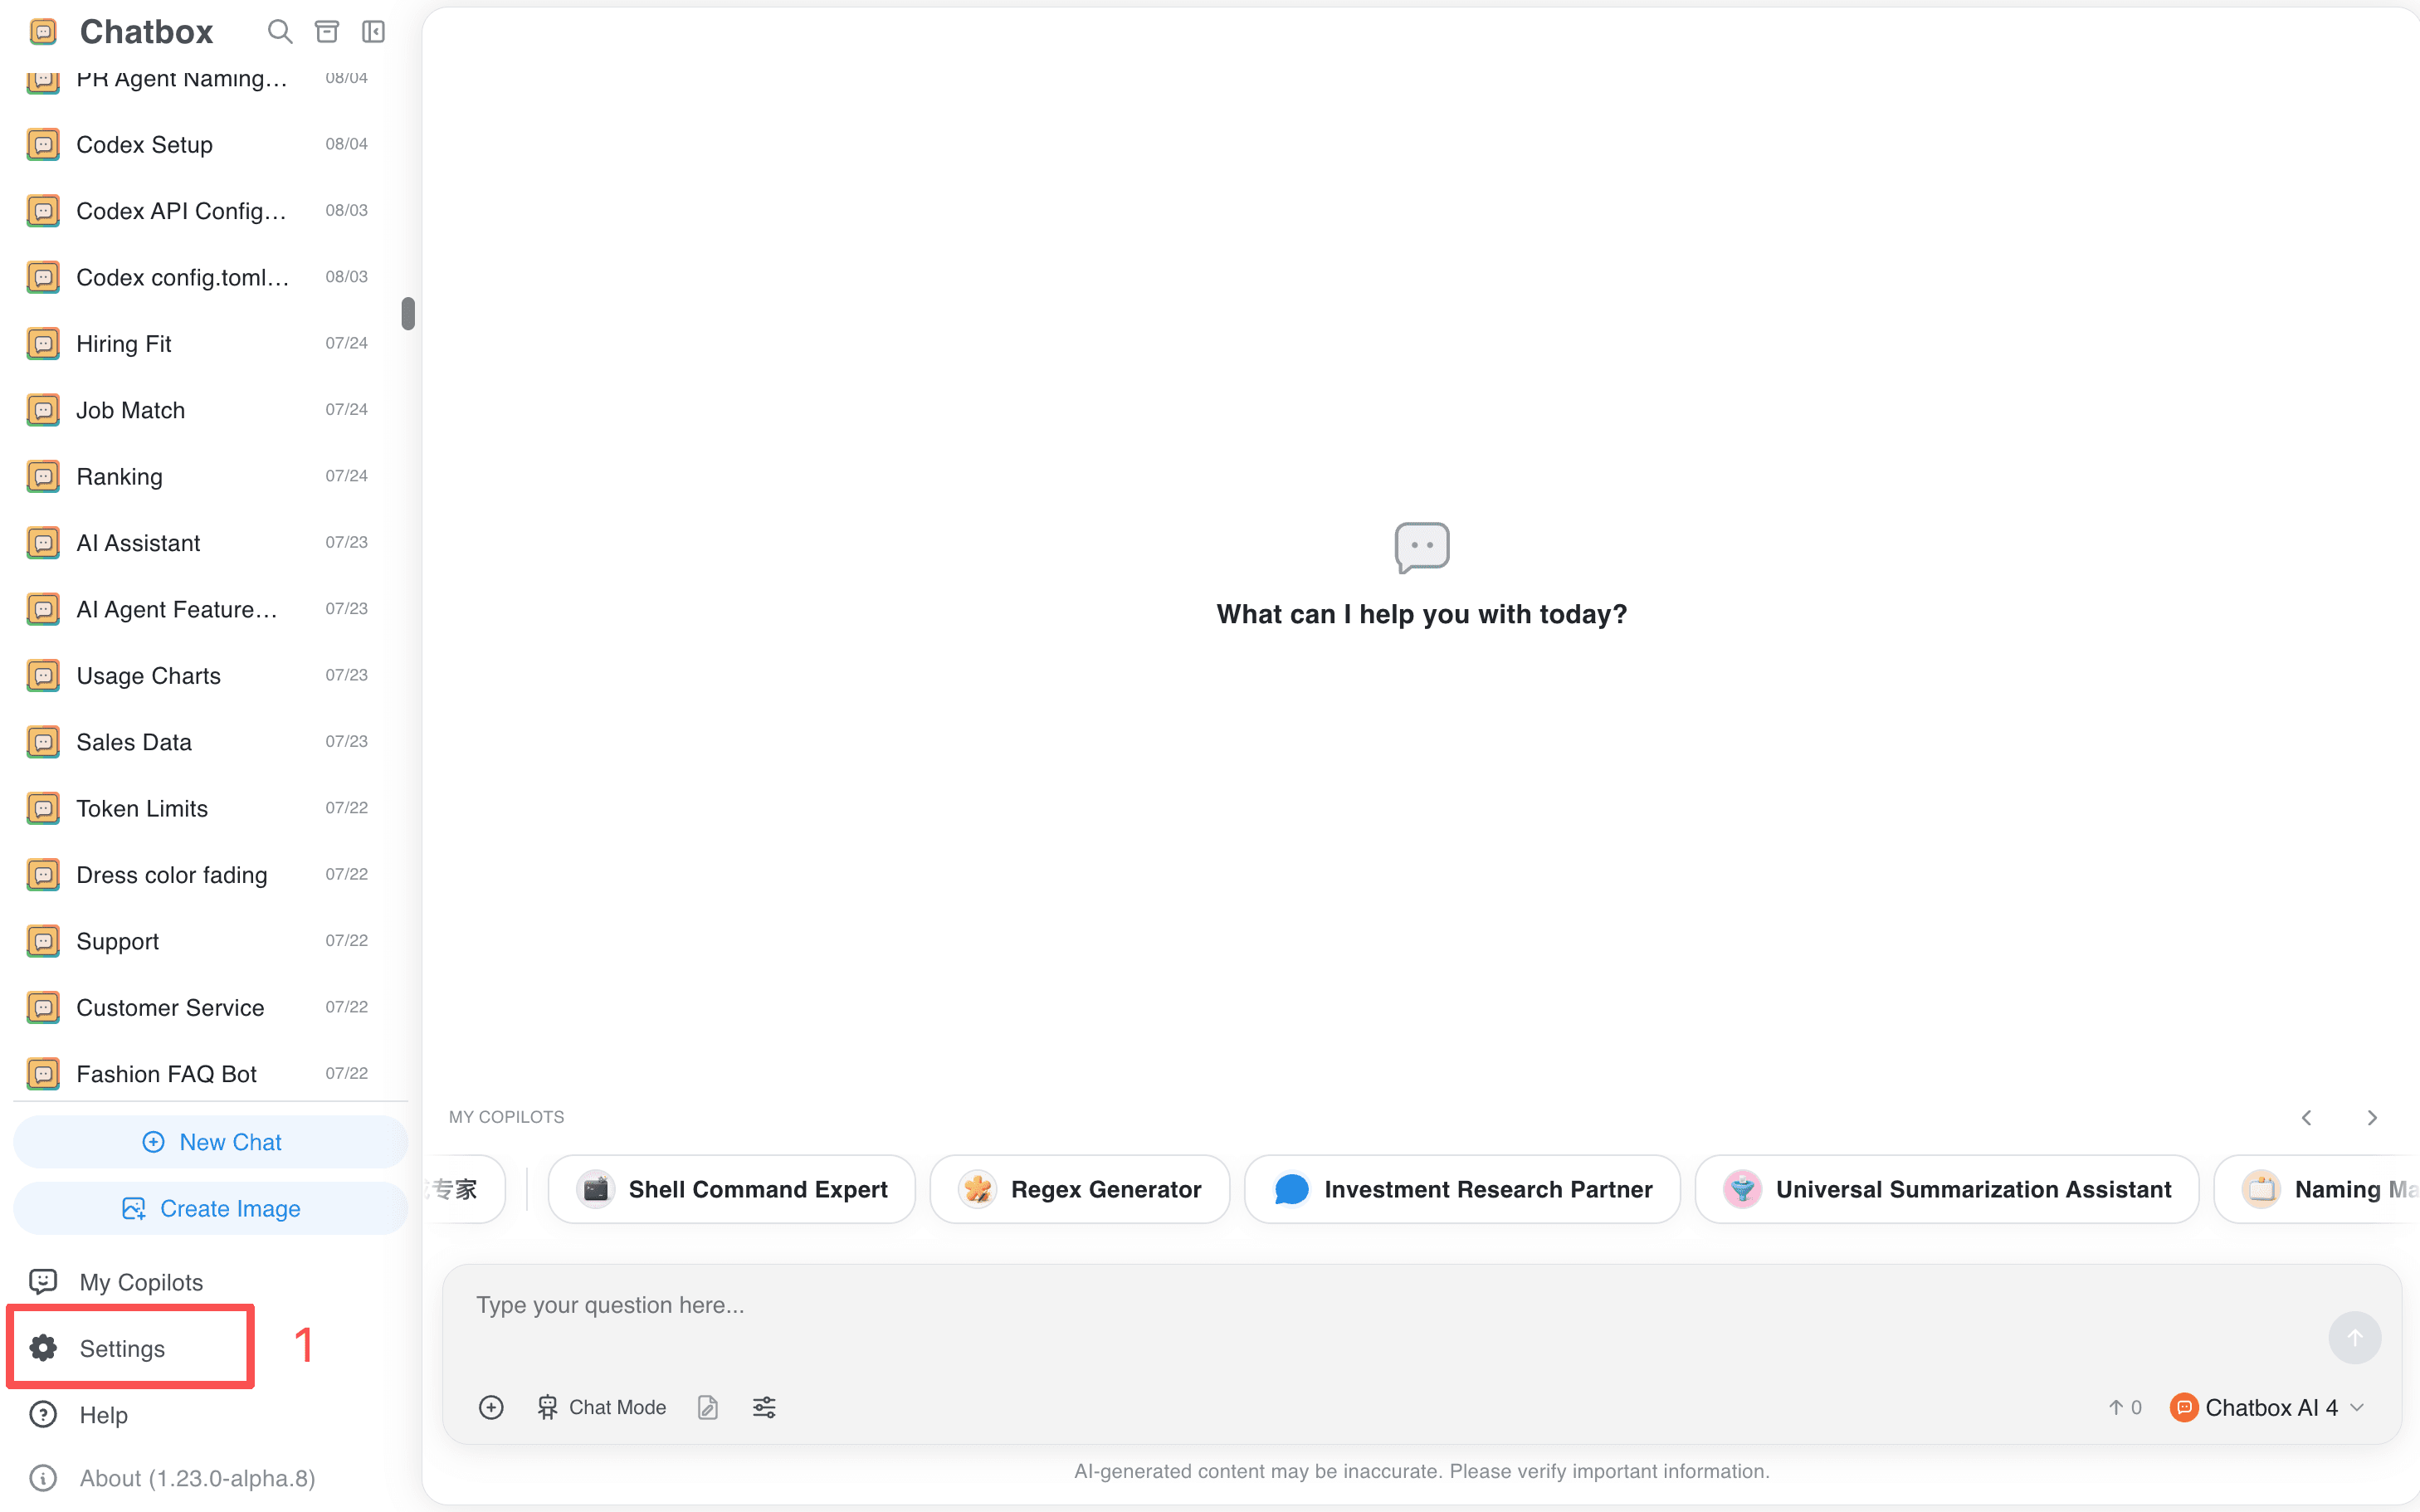
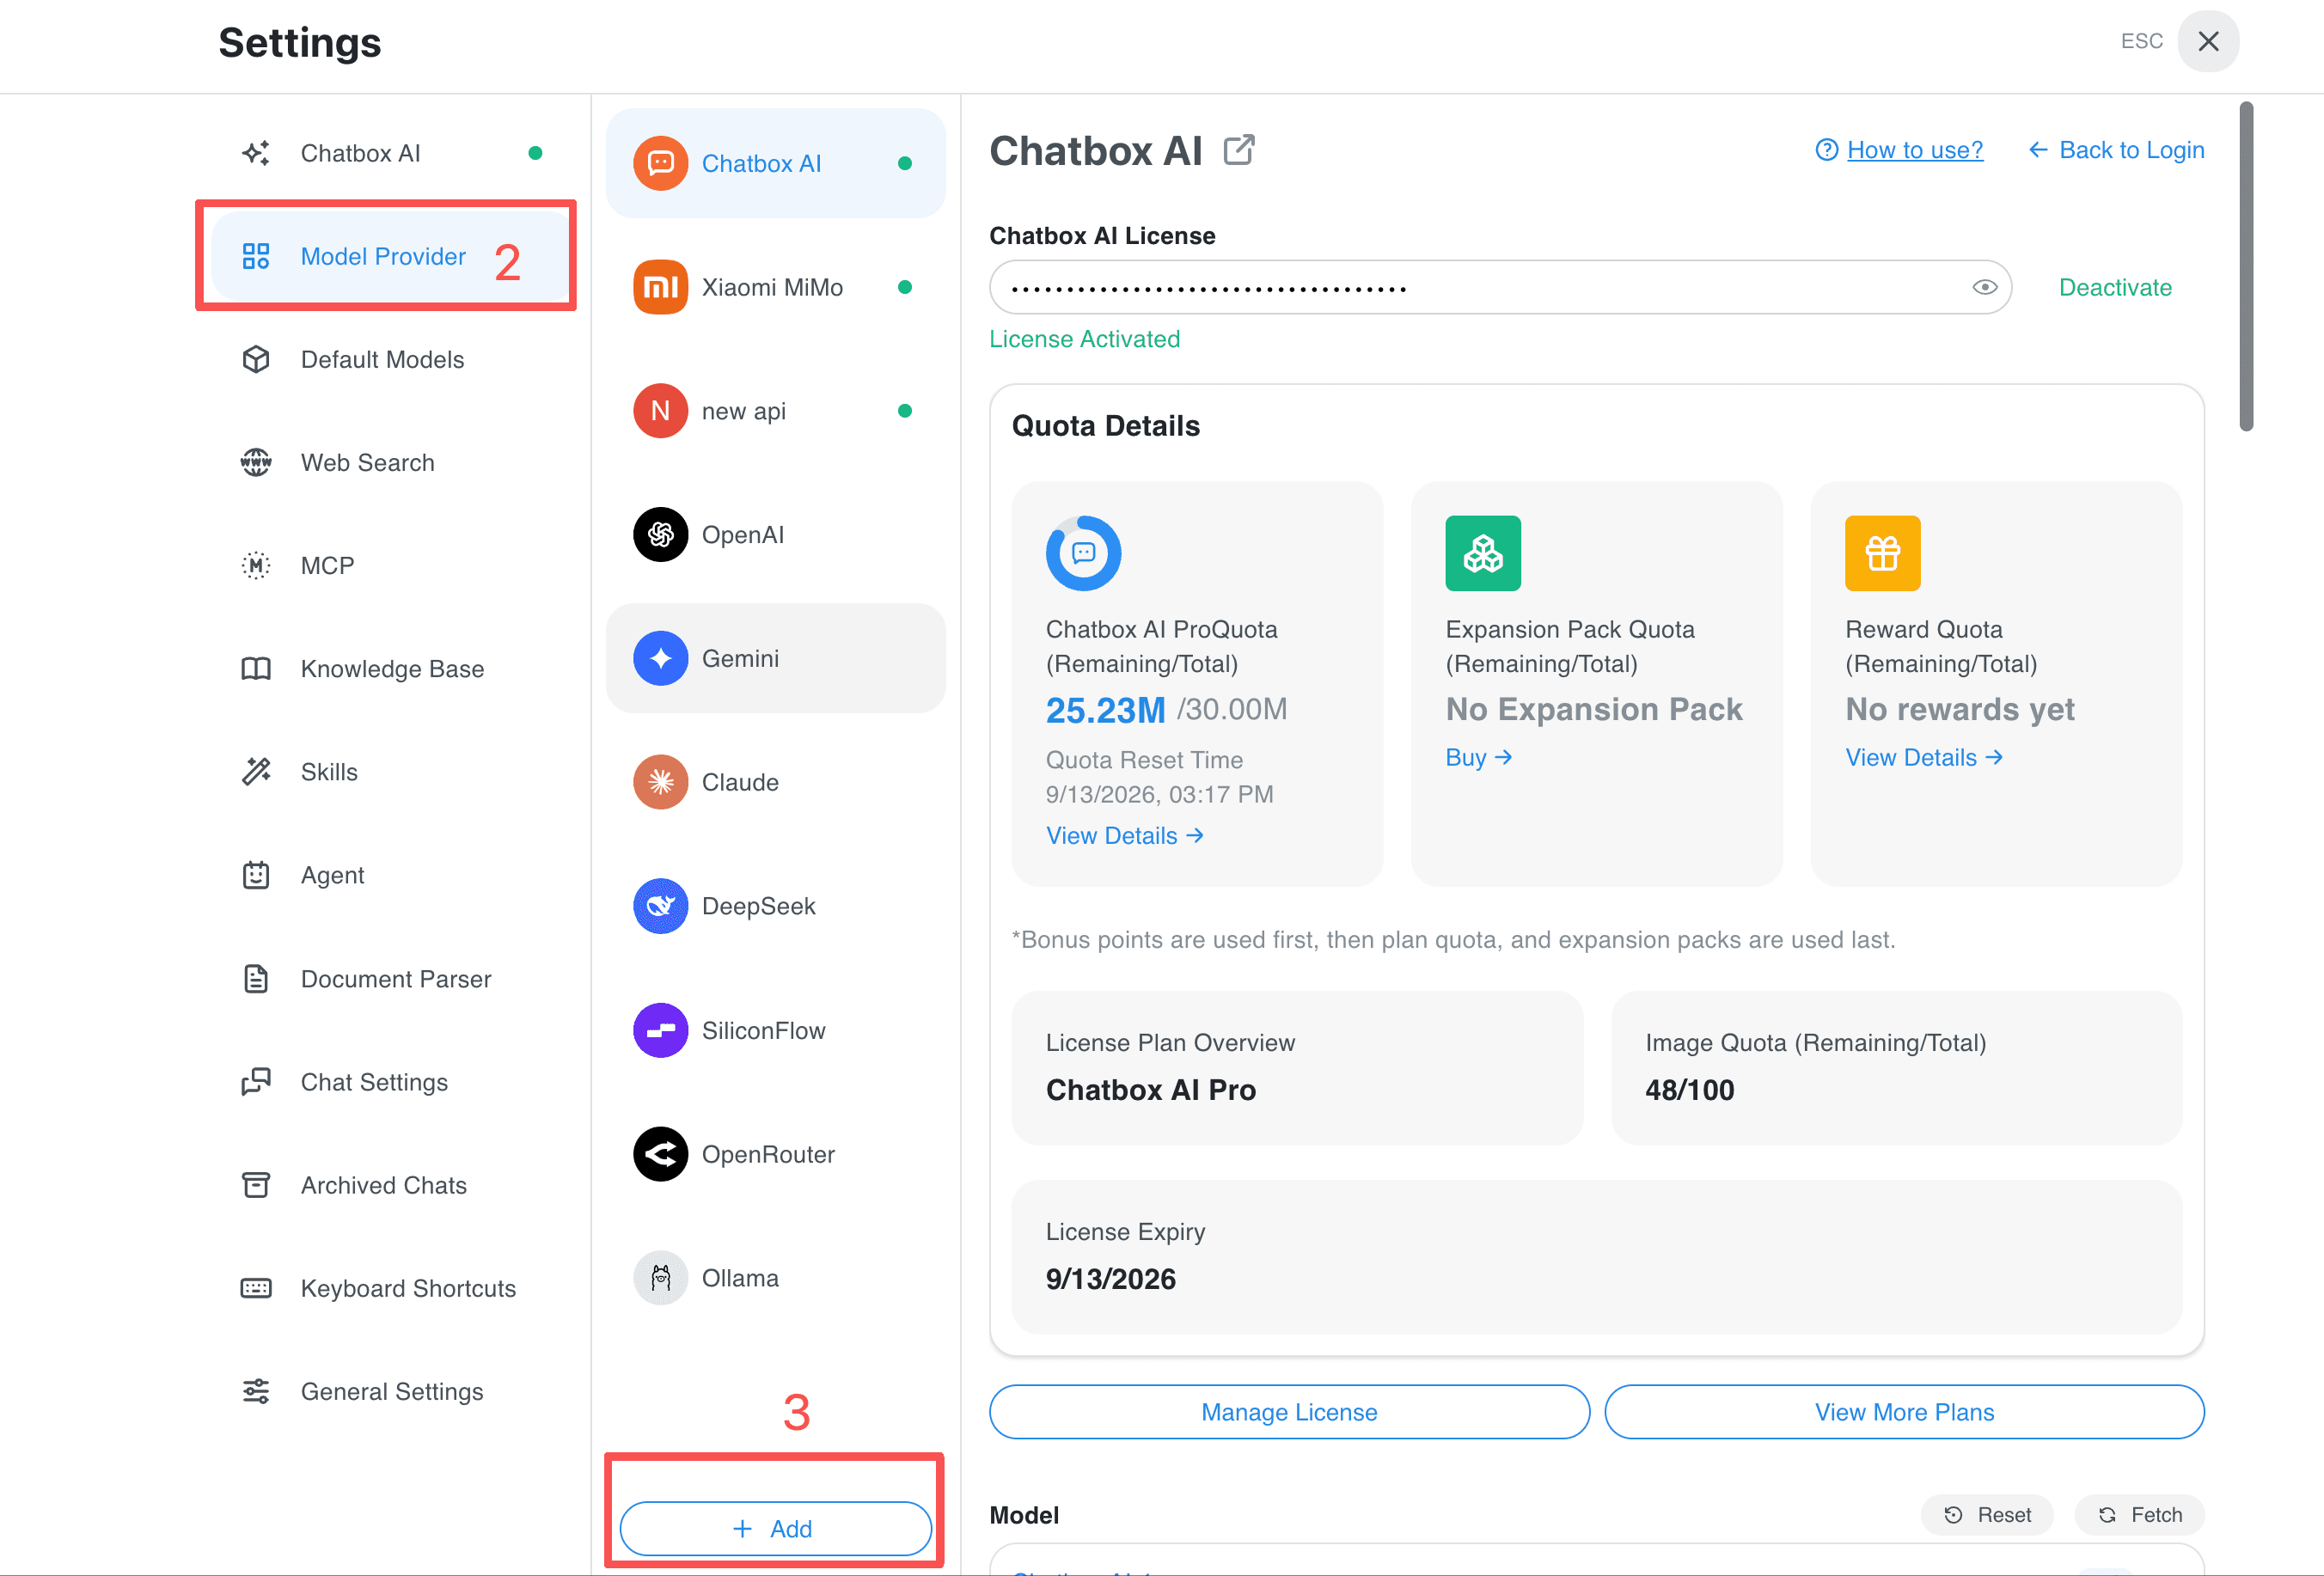
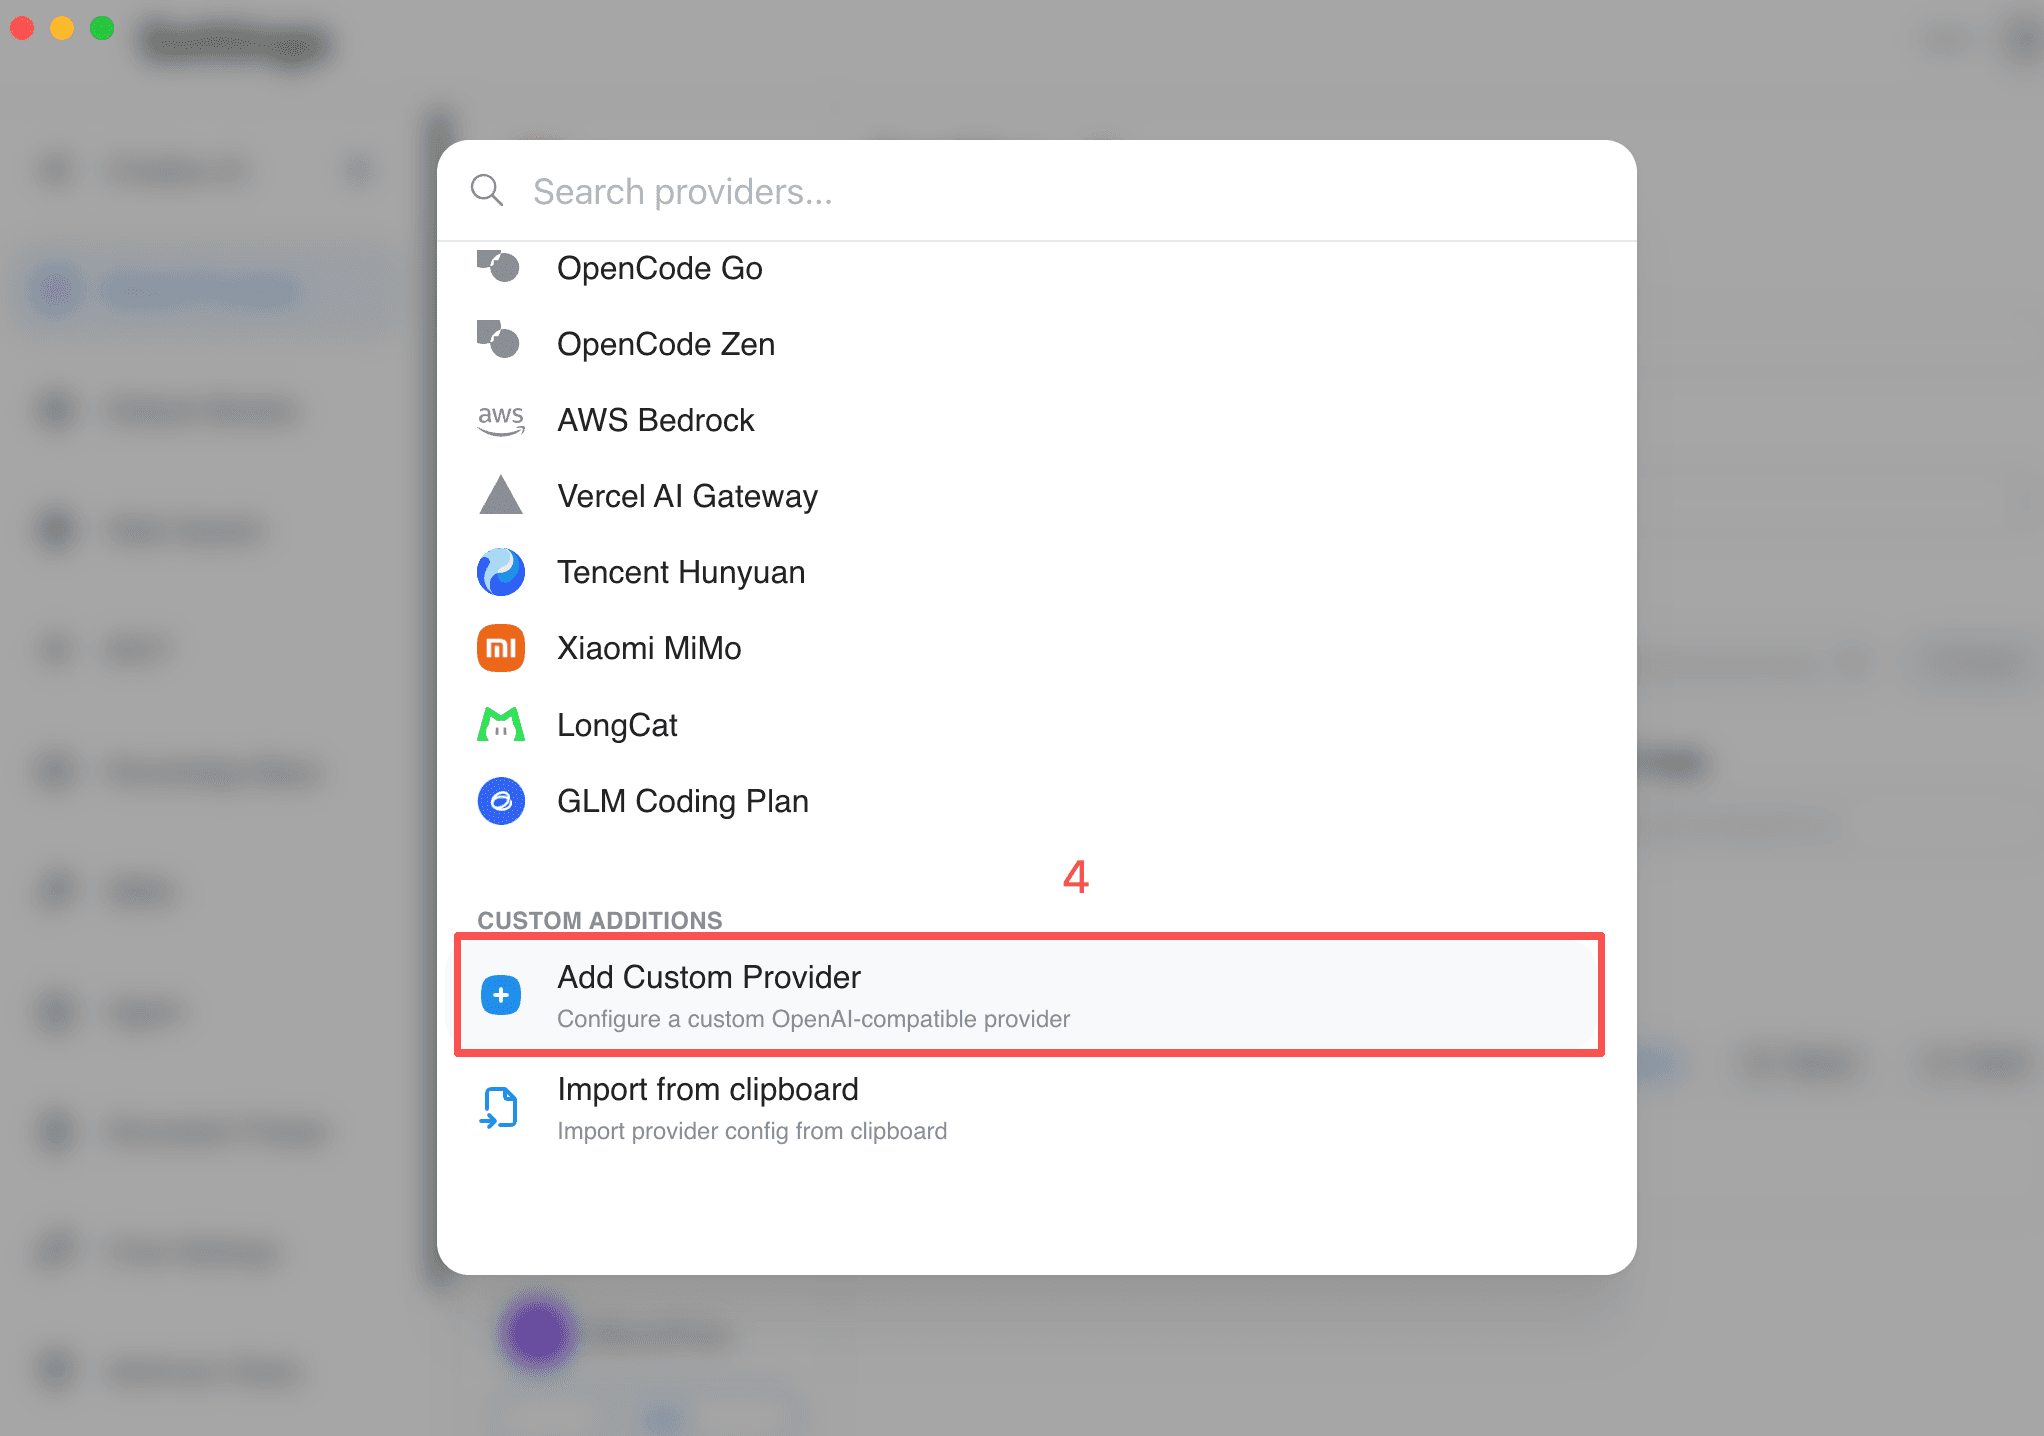
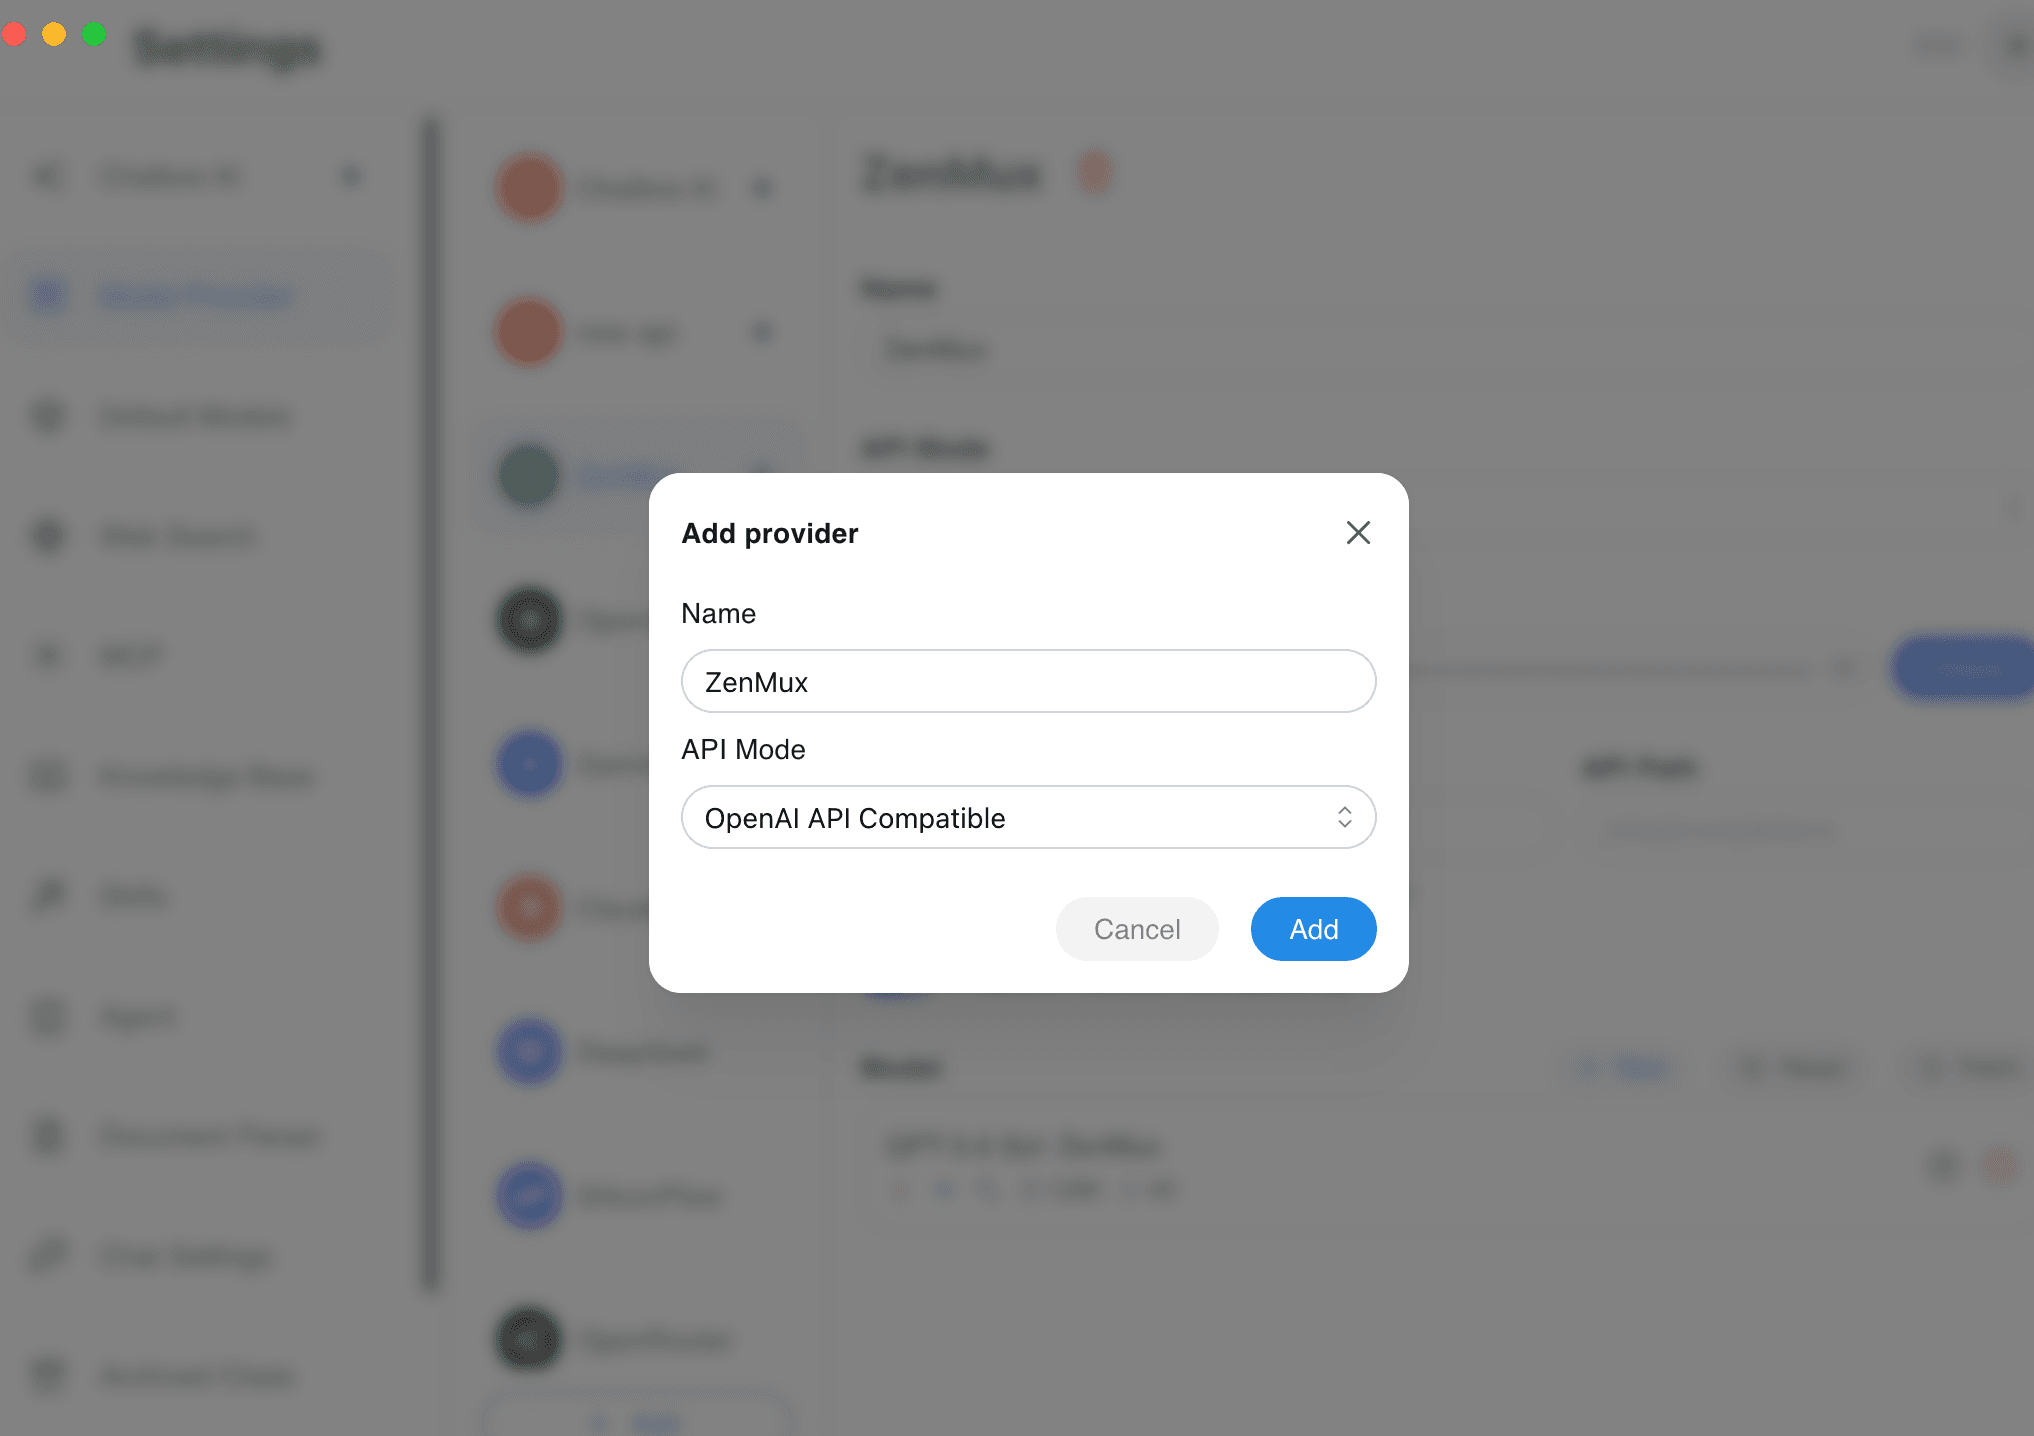
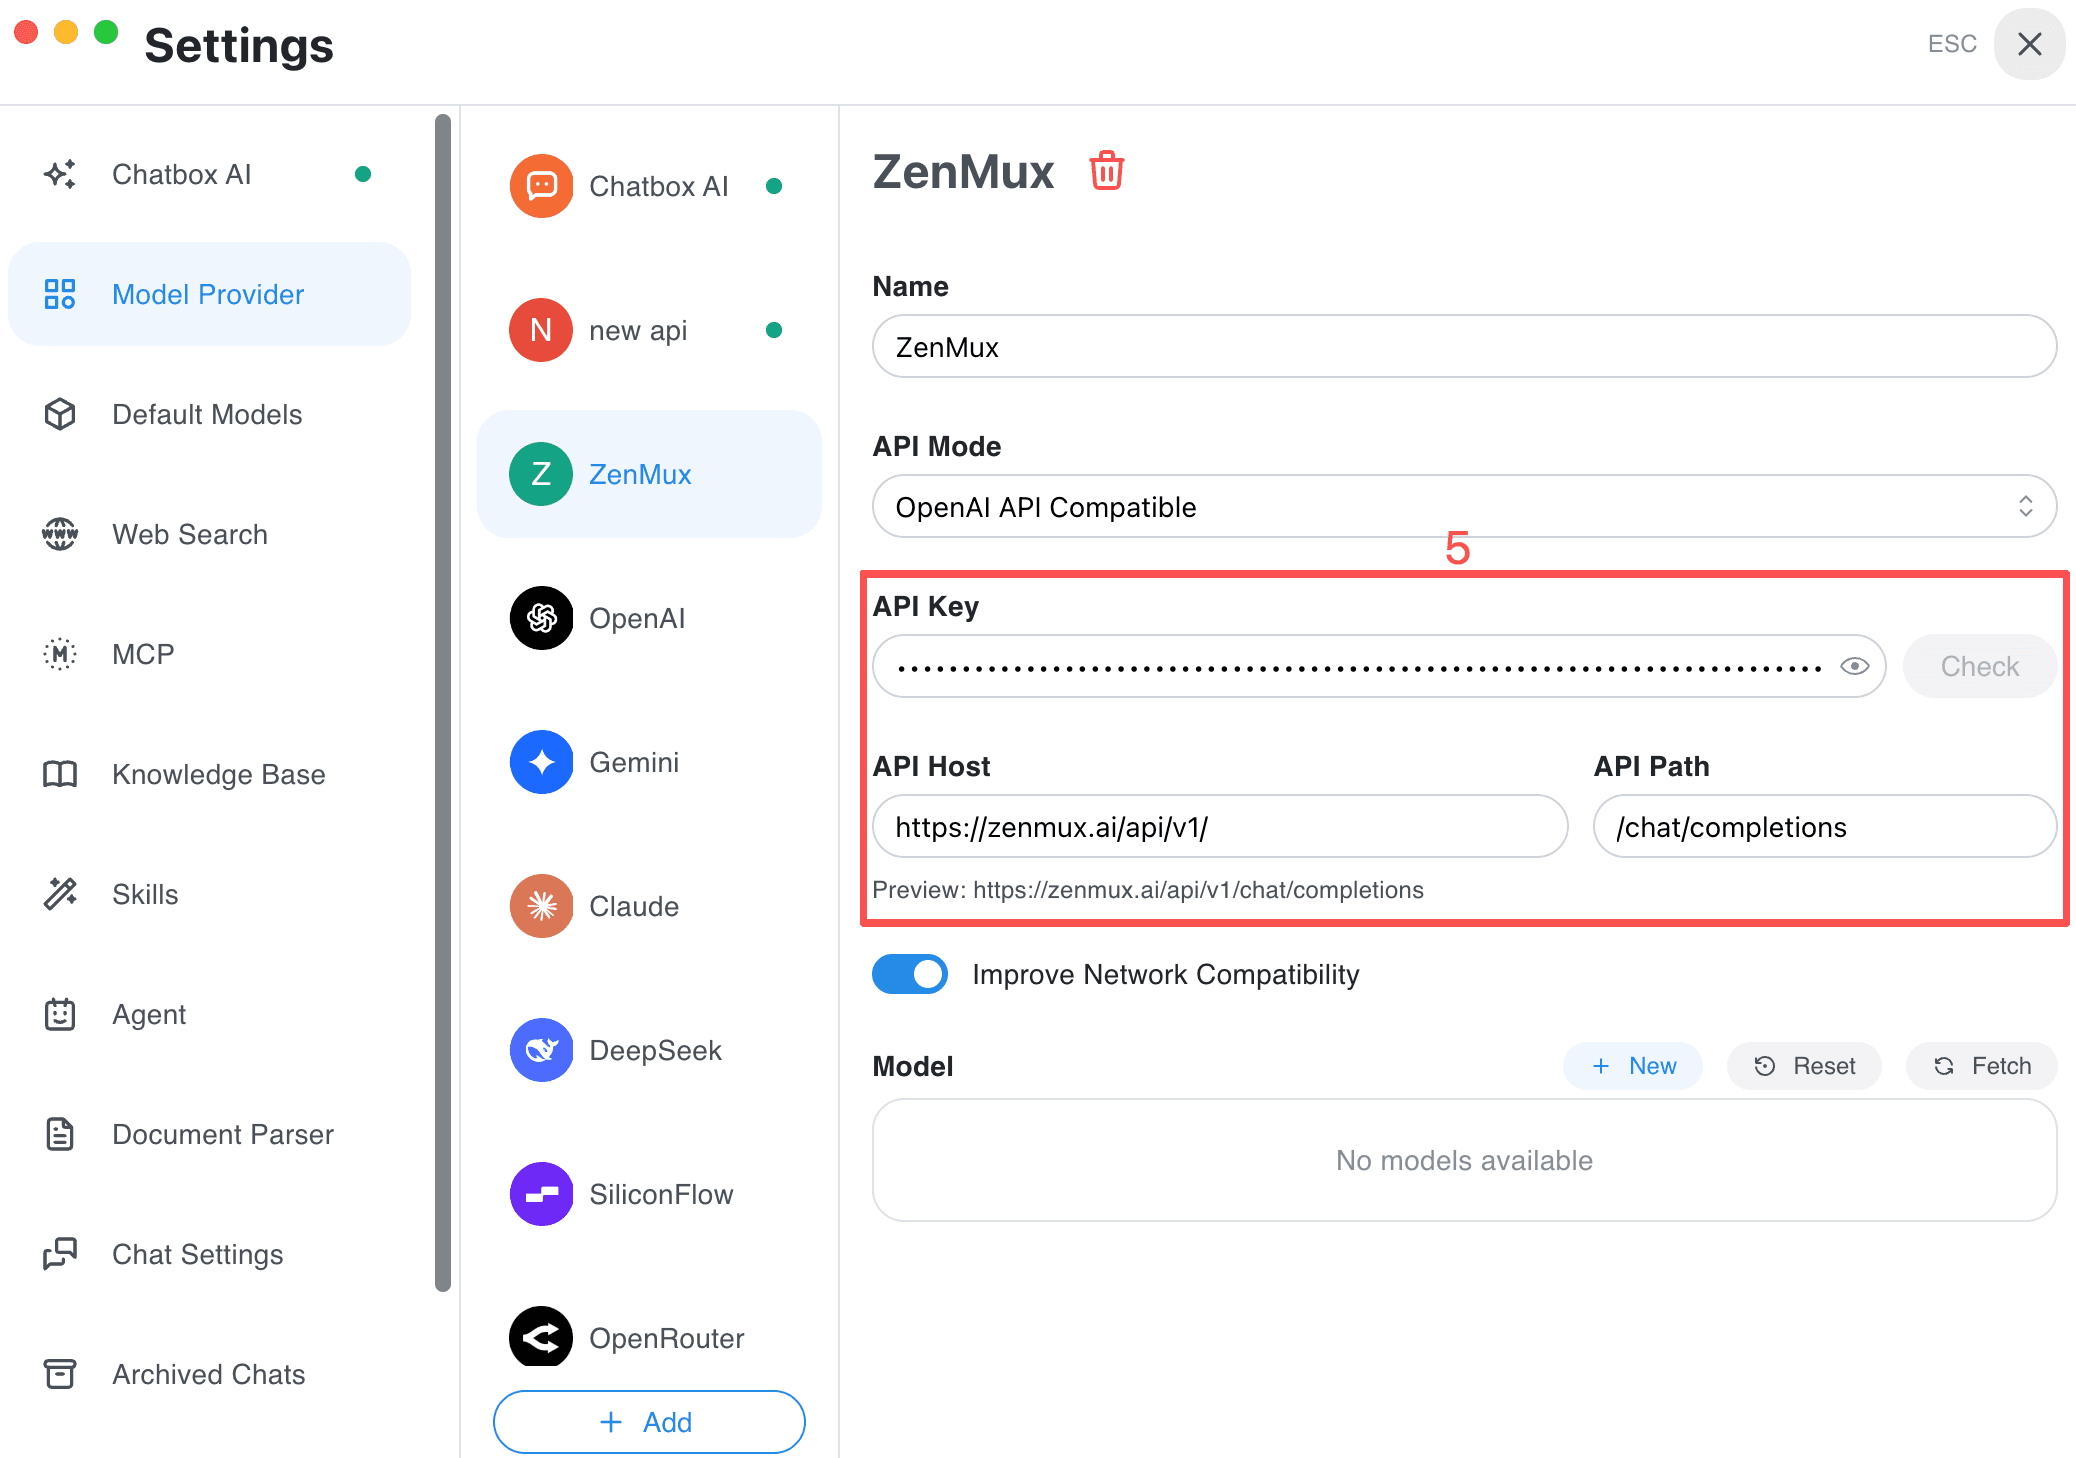
- Enter the following settings:
| Setting | Value |
|---|---|
| API Key | Your ZenMux key, for example sk-ai-v1-xxx |
| API Host | https://zenmux.ai/api/v1/ |
| API Path | /chat/completions |
Create a key in the ZenMux Console. Use the API Host above; the complete request URL should contain /v1/chat/completions only once.
Add a Model
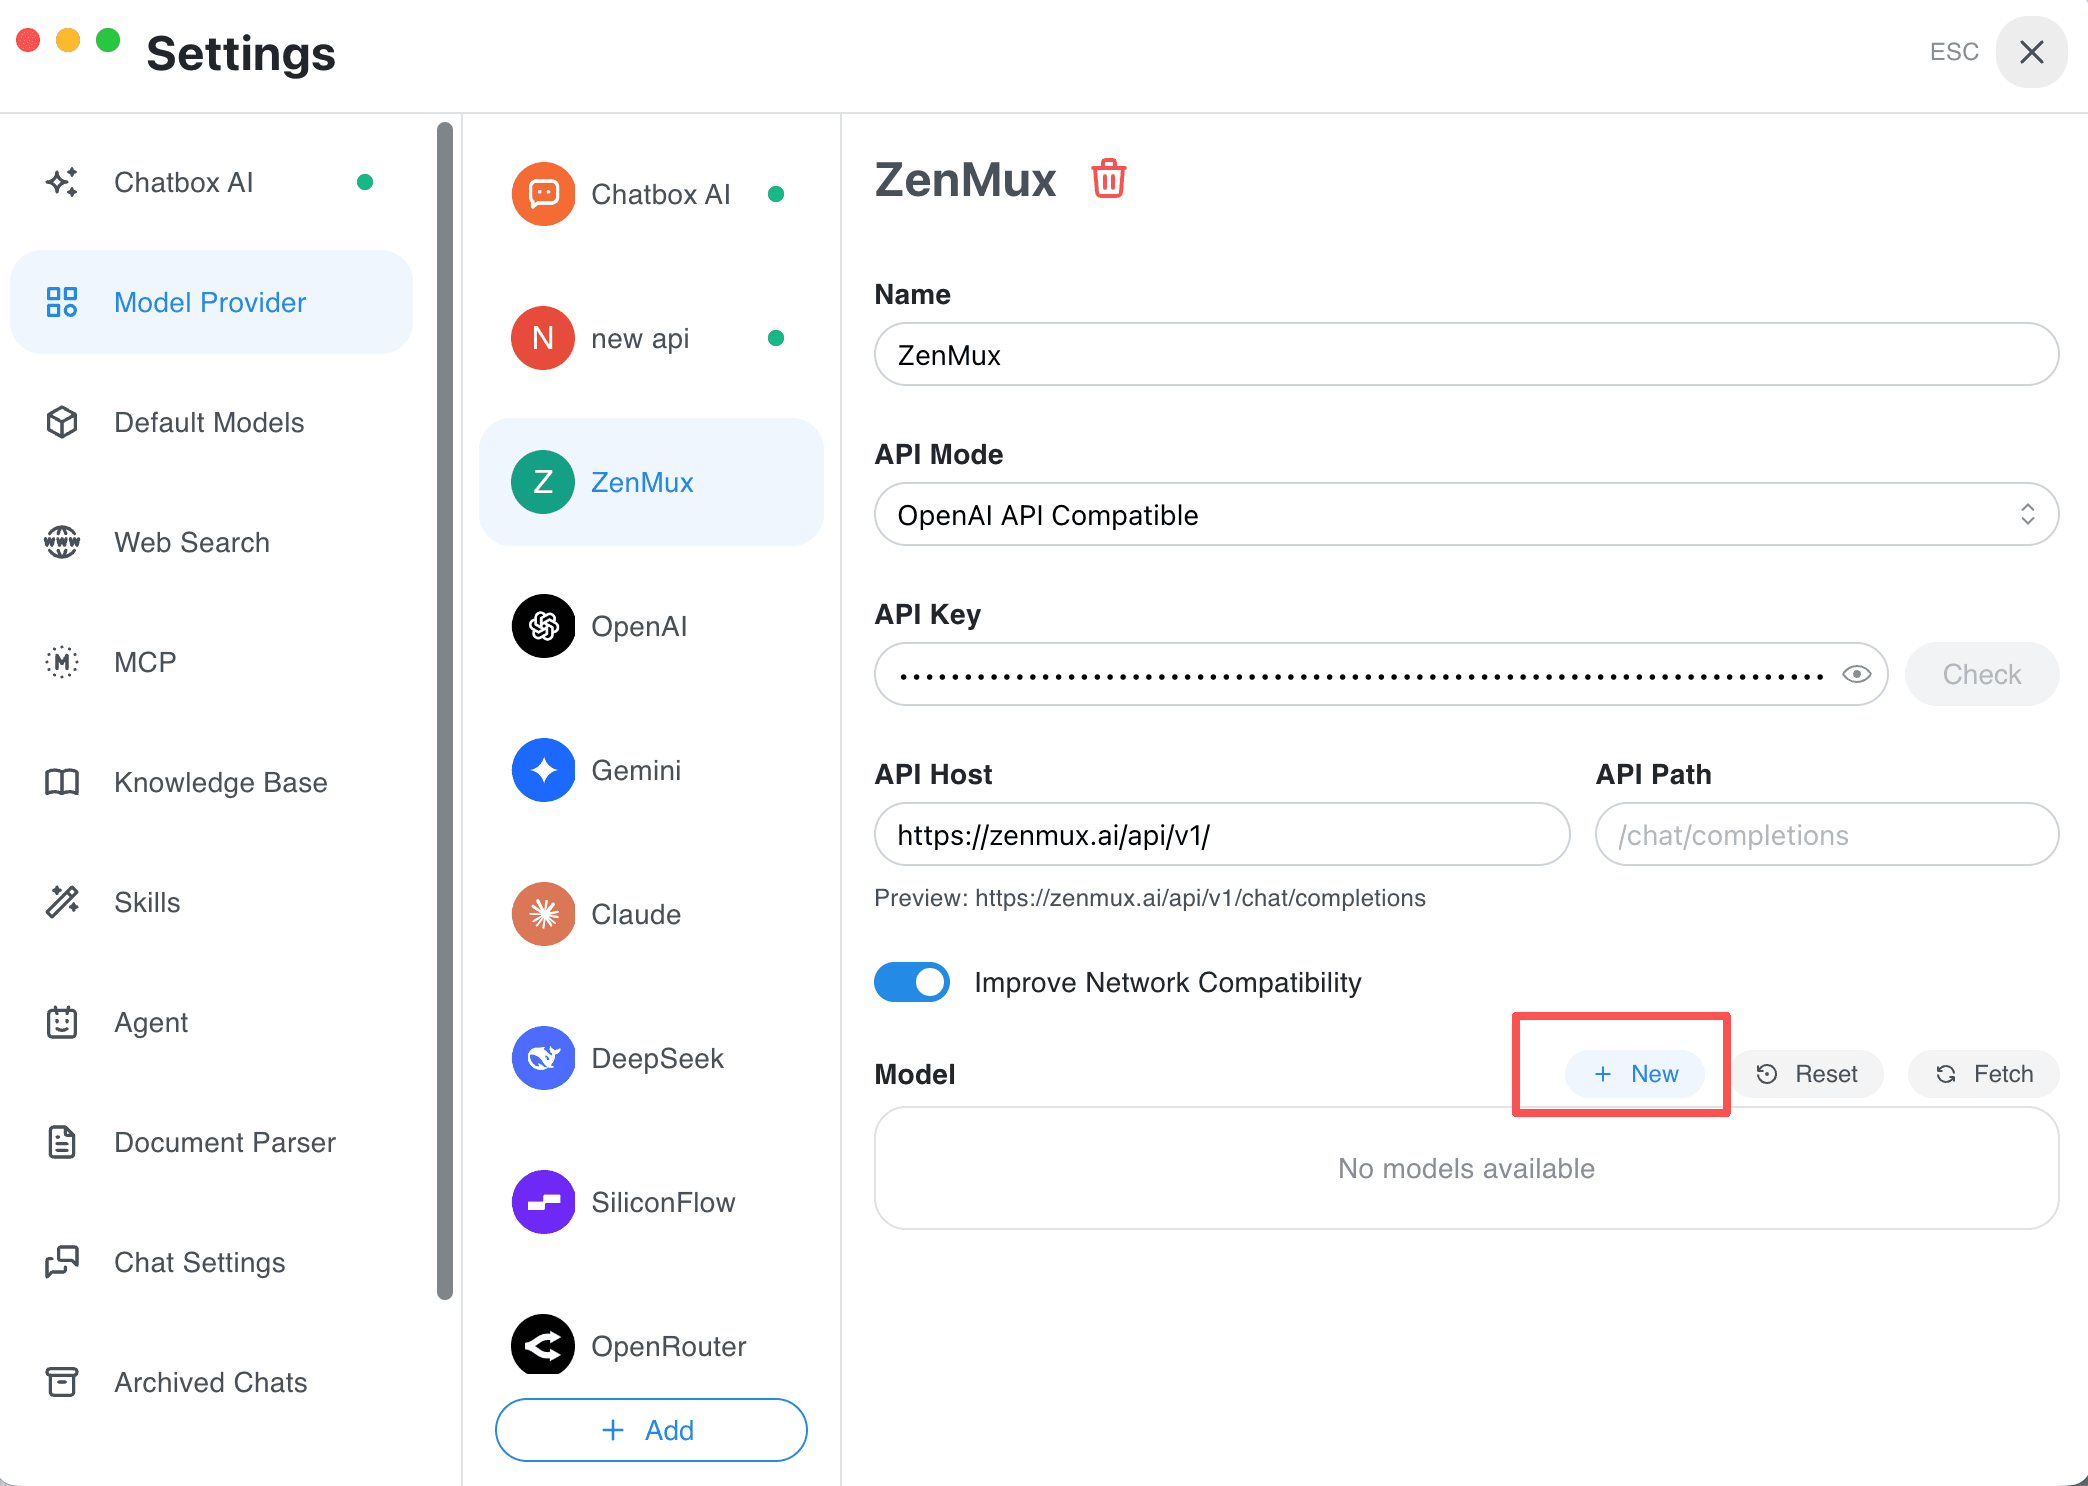
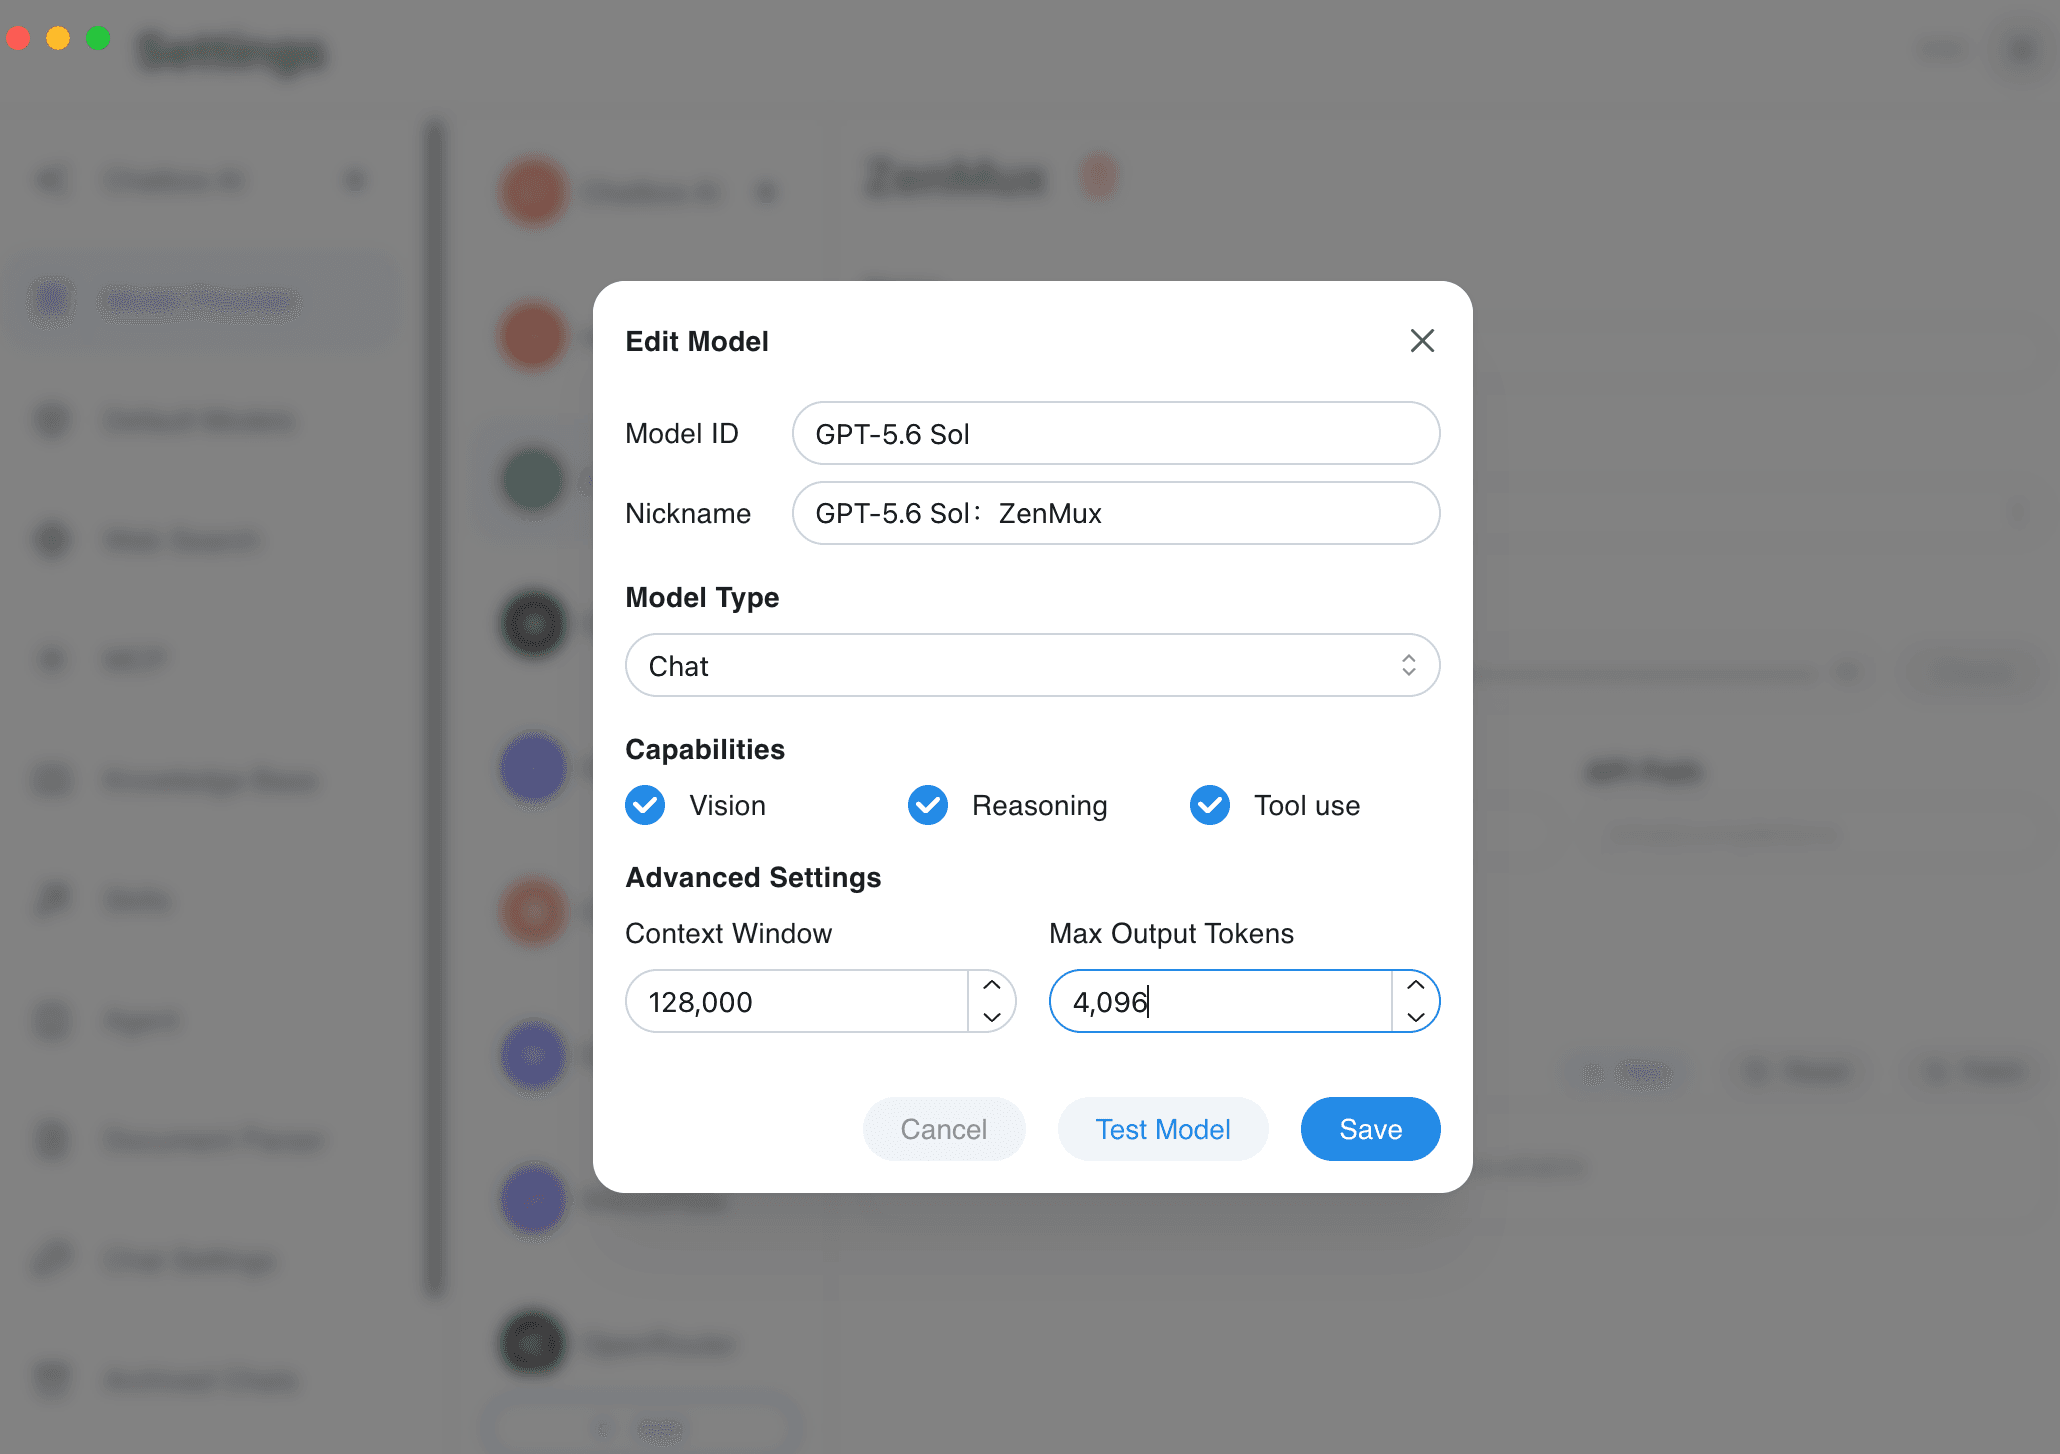
The screenshots illustrate the model editor. Use the exact model ID and limits from your provider console, which may differ from the examples shown.
Scroll to Models, click New, and enter a model supported by ZenMux. For example:
| Setting | Example |
|---|---|
| Model ID | Copy the exact ID from the ZenMux model list, including its provider prefix |
| Nickname | ZenMux model |
| Model Type | Chat |
| Context Window | Use the selected model’s documented limit |
| Max Output Tokens | Within the selected model’s output limit |
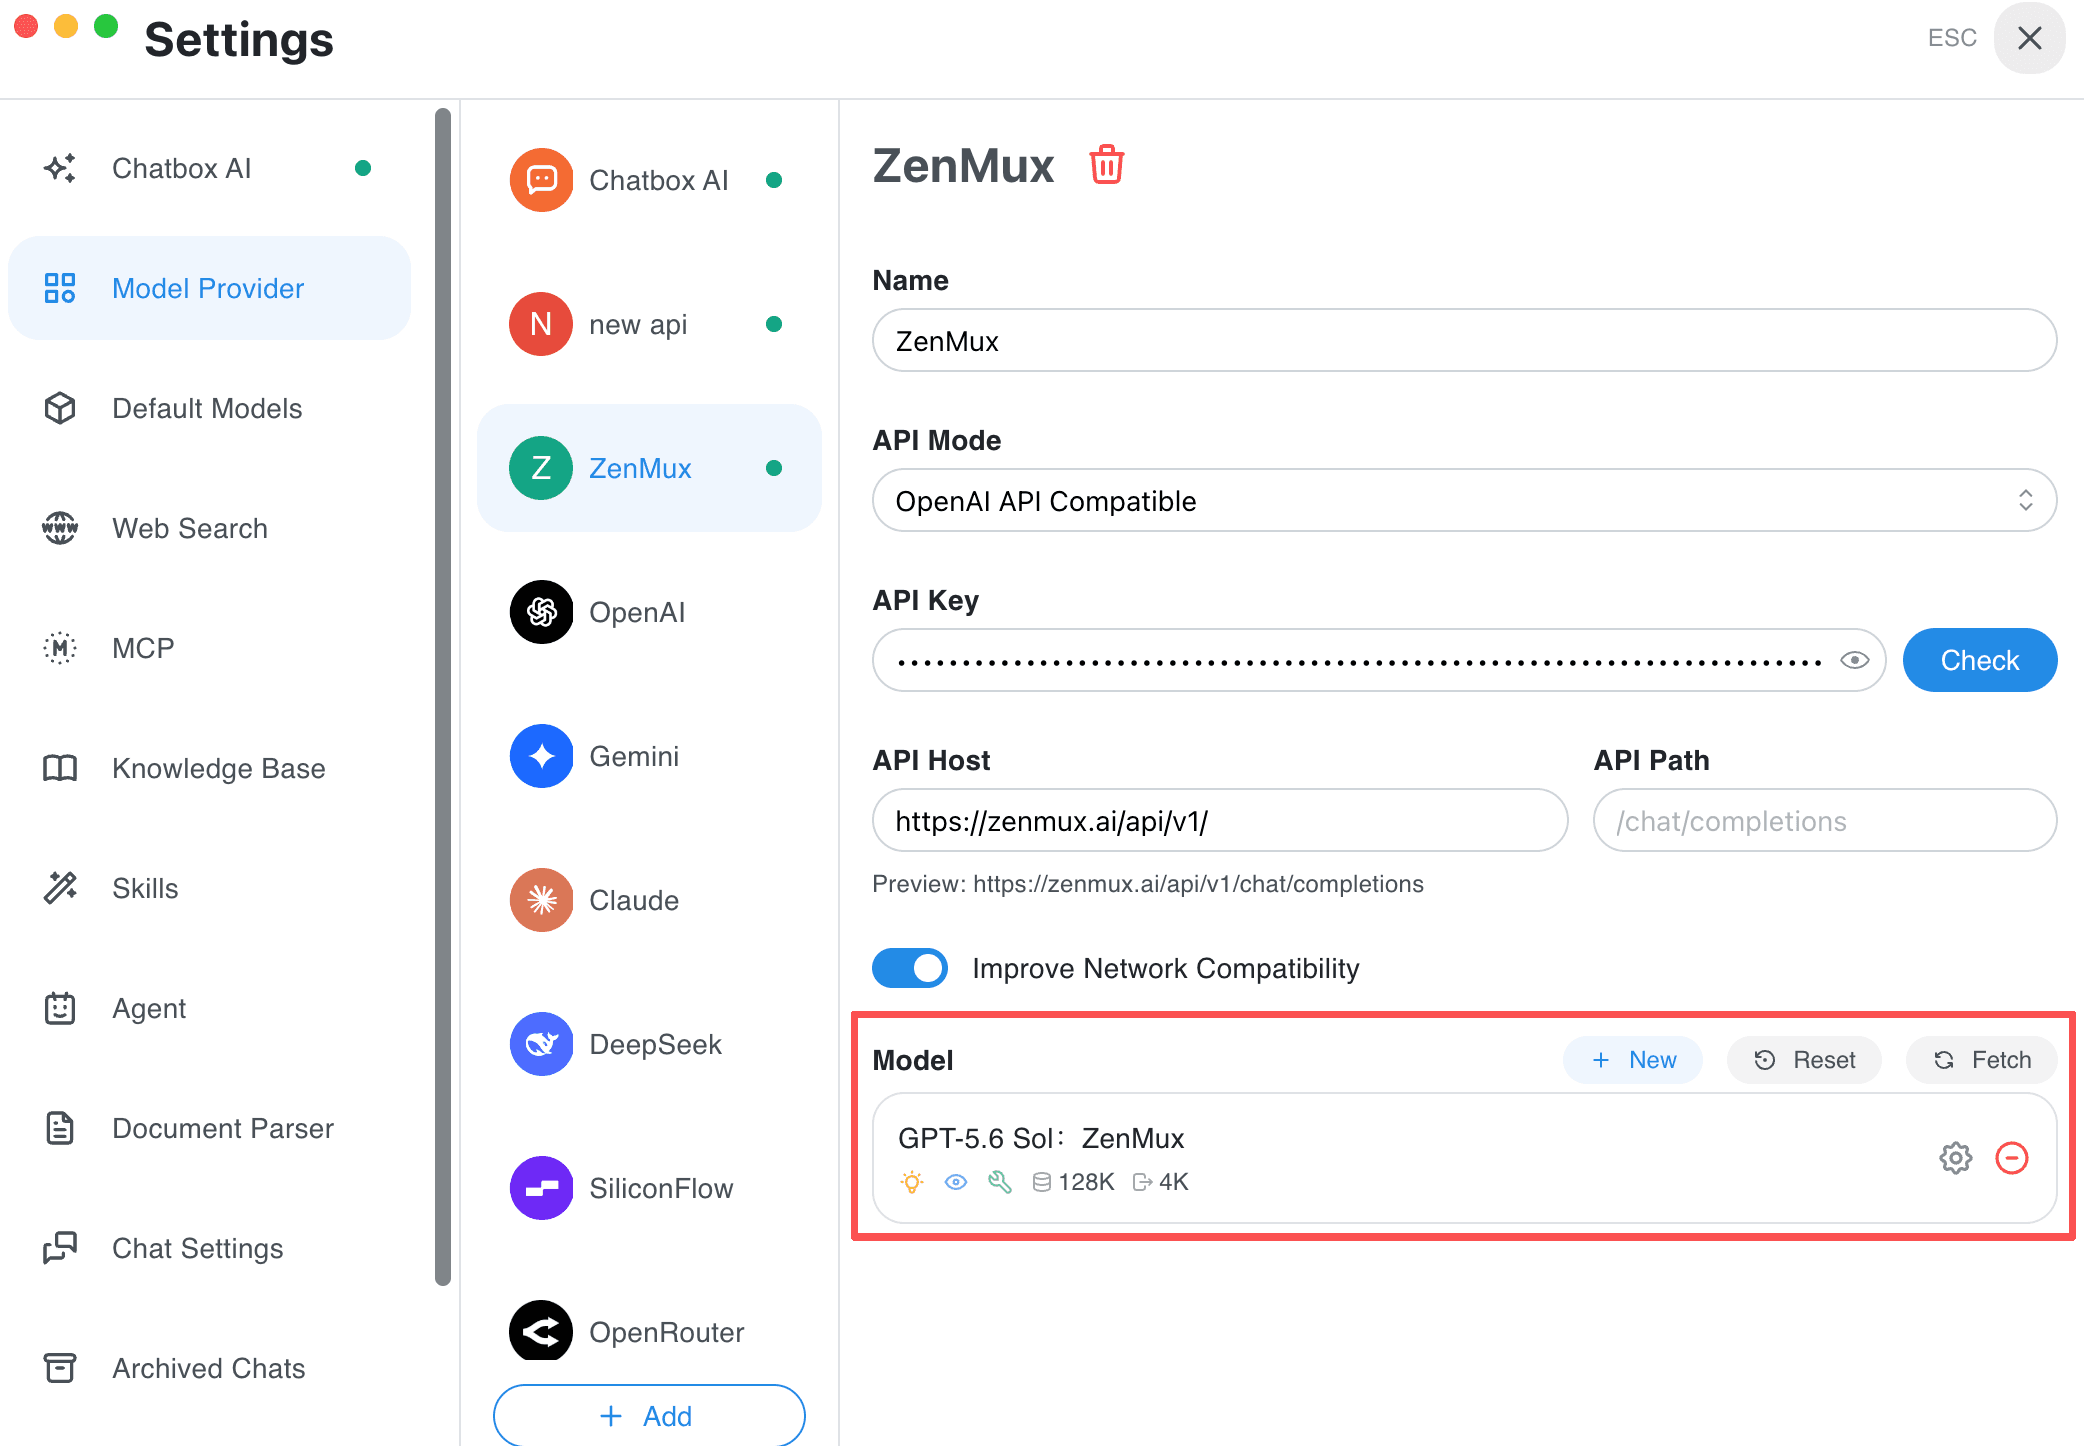
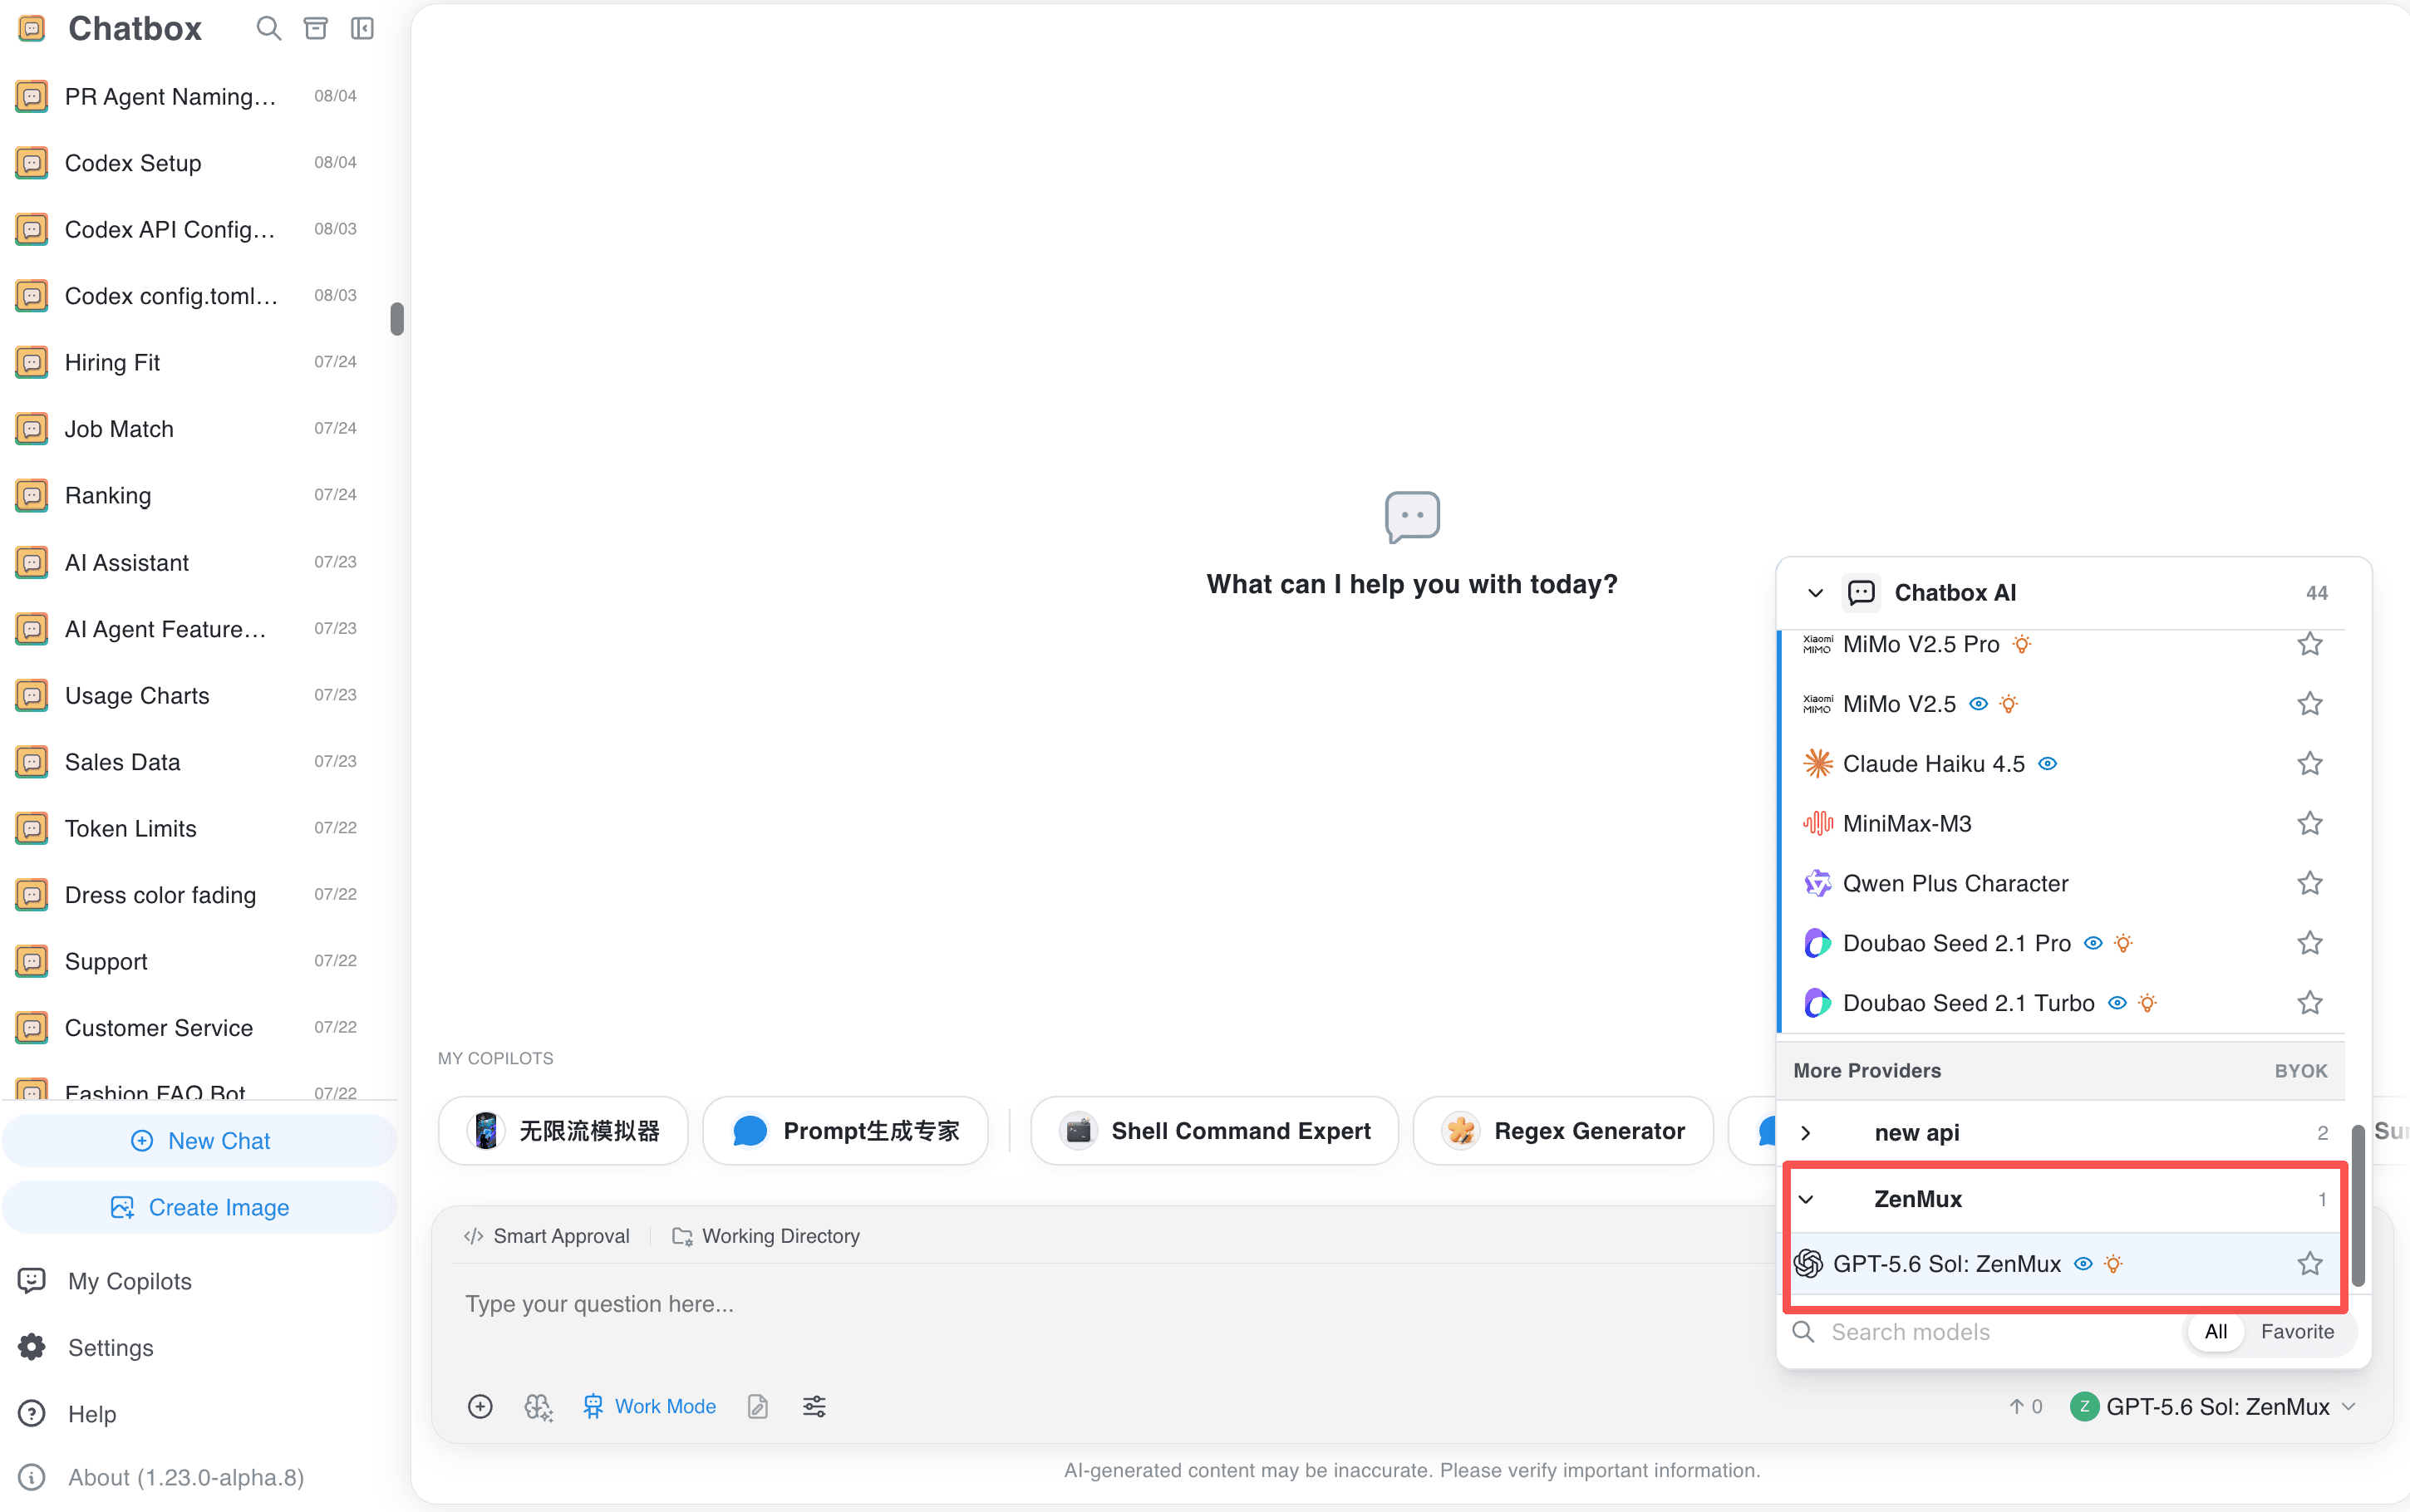
Click Check, save the configuration, and select the new model from the model selector.
Start a Conversation
Select a configured ZenMux model in the model selector to start a conversation. See the ZenMux model list for current model IDs, prices, capabilities, and protocol support.
Troubleshooting
- Confirm the key starts with
sk-ai-v1-, is active, and belongs to an account with sufficient balance. - Confirm the API Host is exactly
https://zenmux.ai/api/v1/and that the selected model supports OpenAI Chat Completions. - If calls fail, enable Improve Network Compatibility, reduce Maximum Output Tokens, or try another model.
Related guides
All providers · Choose a provider · Connection troubleshooting