Kimi For Coding Setup
Configure Kimi For Coding in Chatbox with a custom endpoint and model ID, then check model access and context limits.
Model access
Use the models and context limits listed in your Kimi Code console. Kimi Code subscriptions and Moonshot API billing are separate; use the key issued for this endpoint.
Prepare Your Credentials
- Create and save an API Key in the Kimi Code Console.
- Confirm that your membership allows the model you plan to use.
Add the Kimi Provider
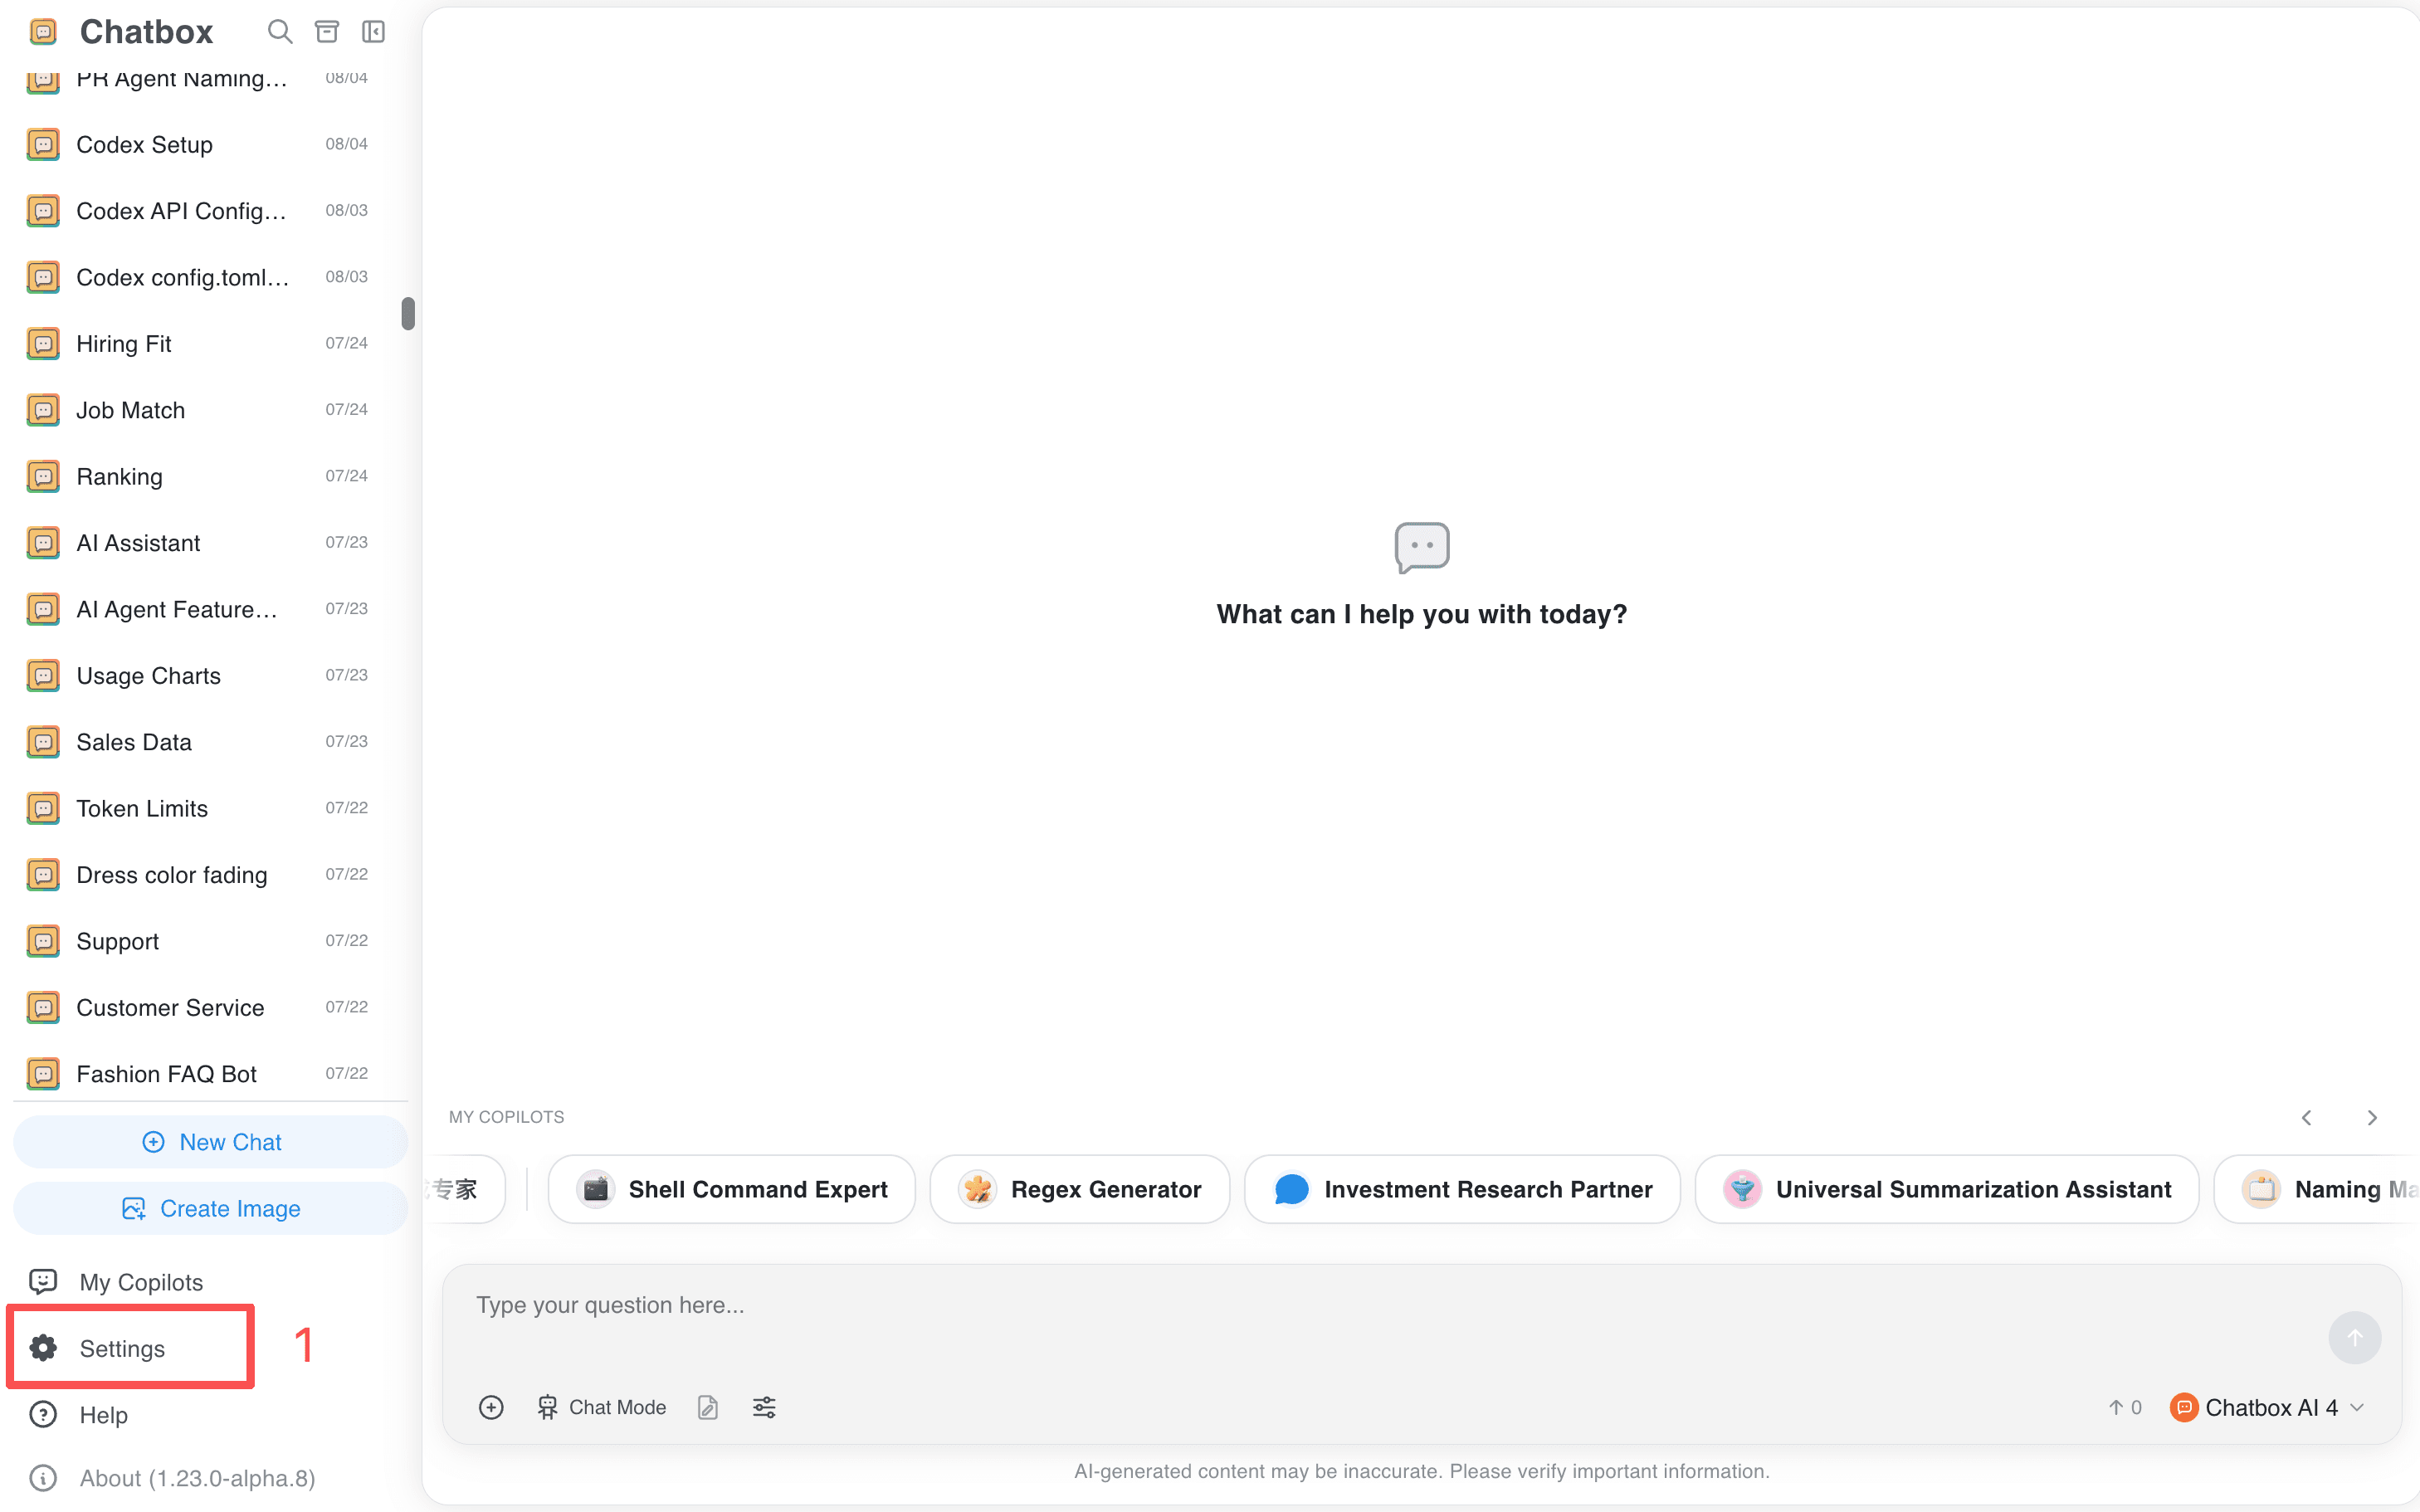
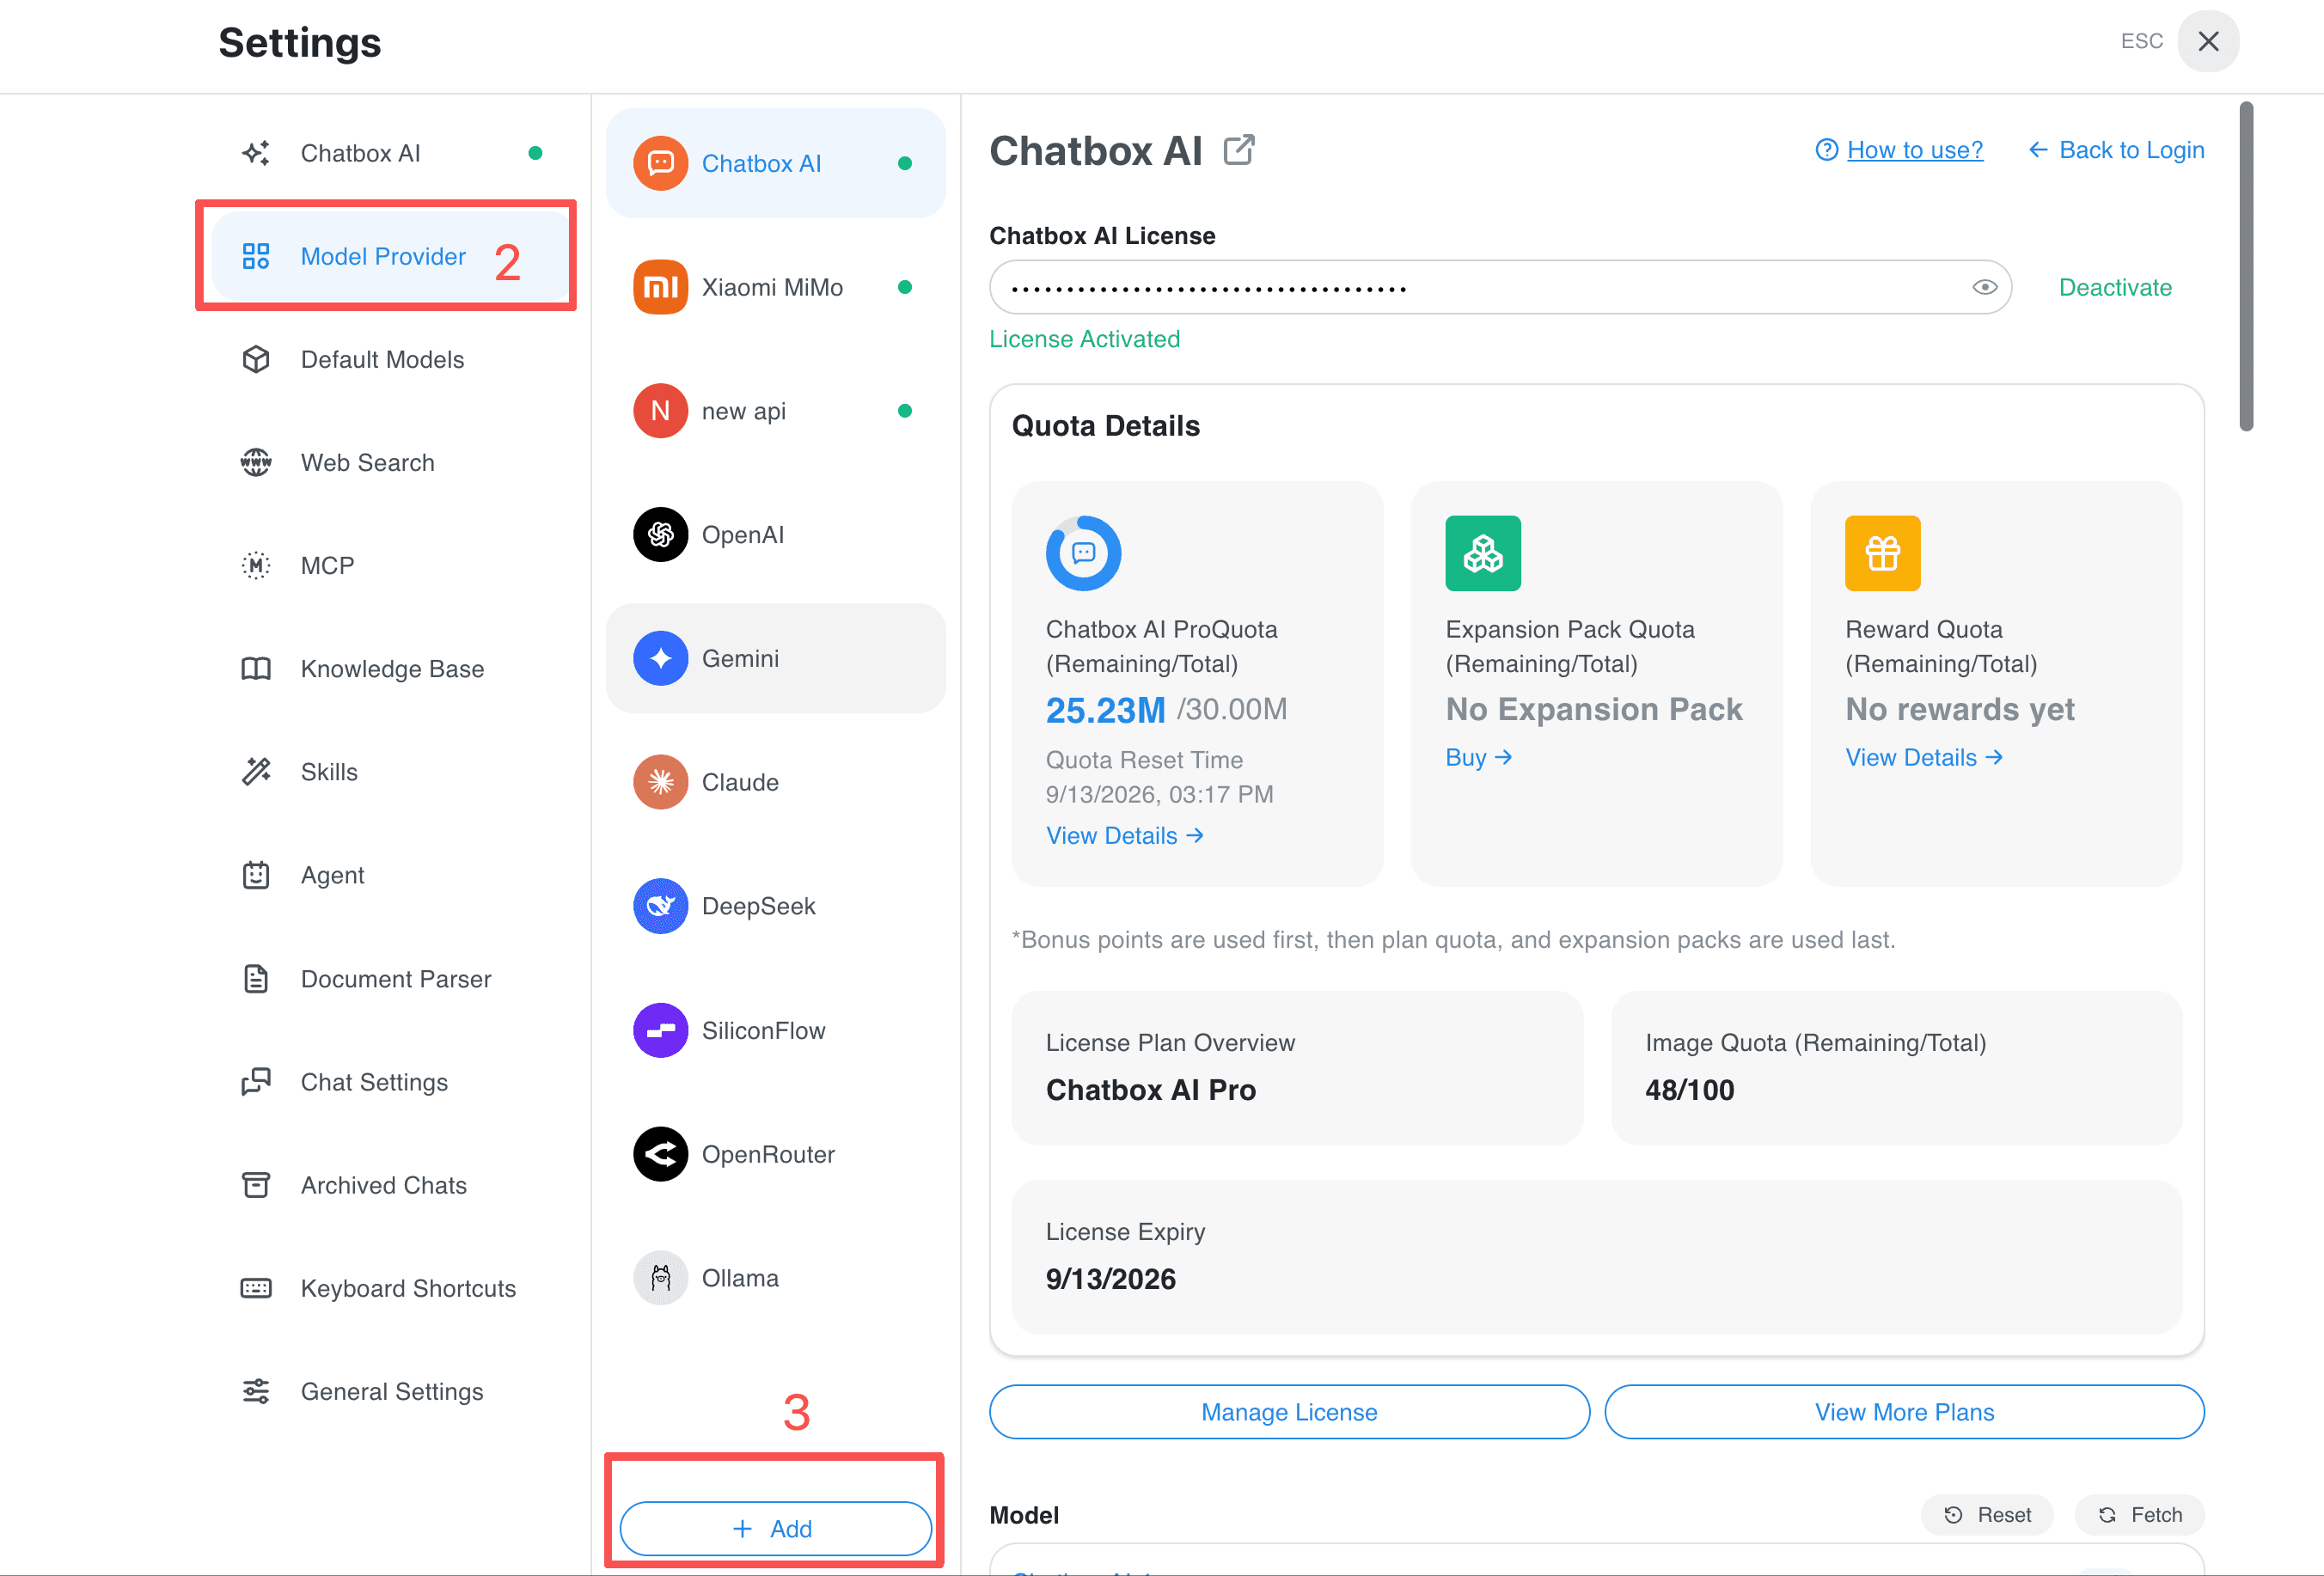
- Open Settings and select Model Provider.
- Click Add at the bottom of the provider list.
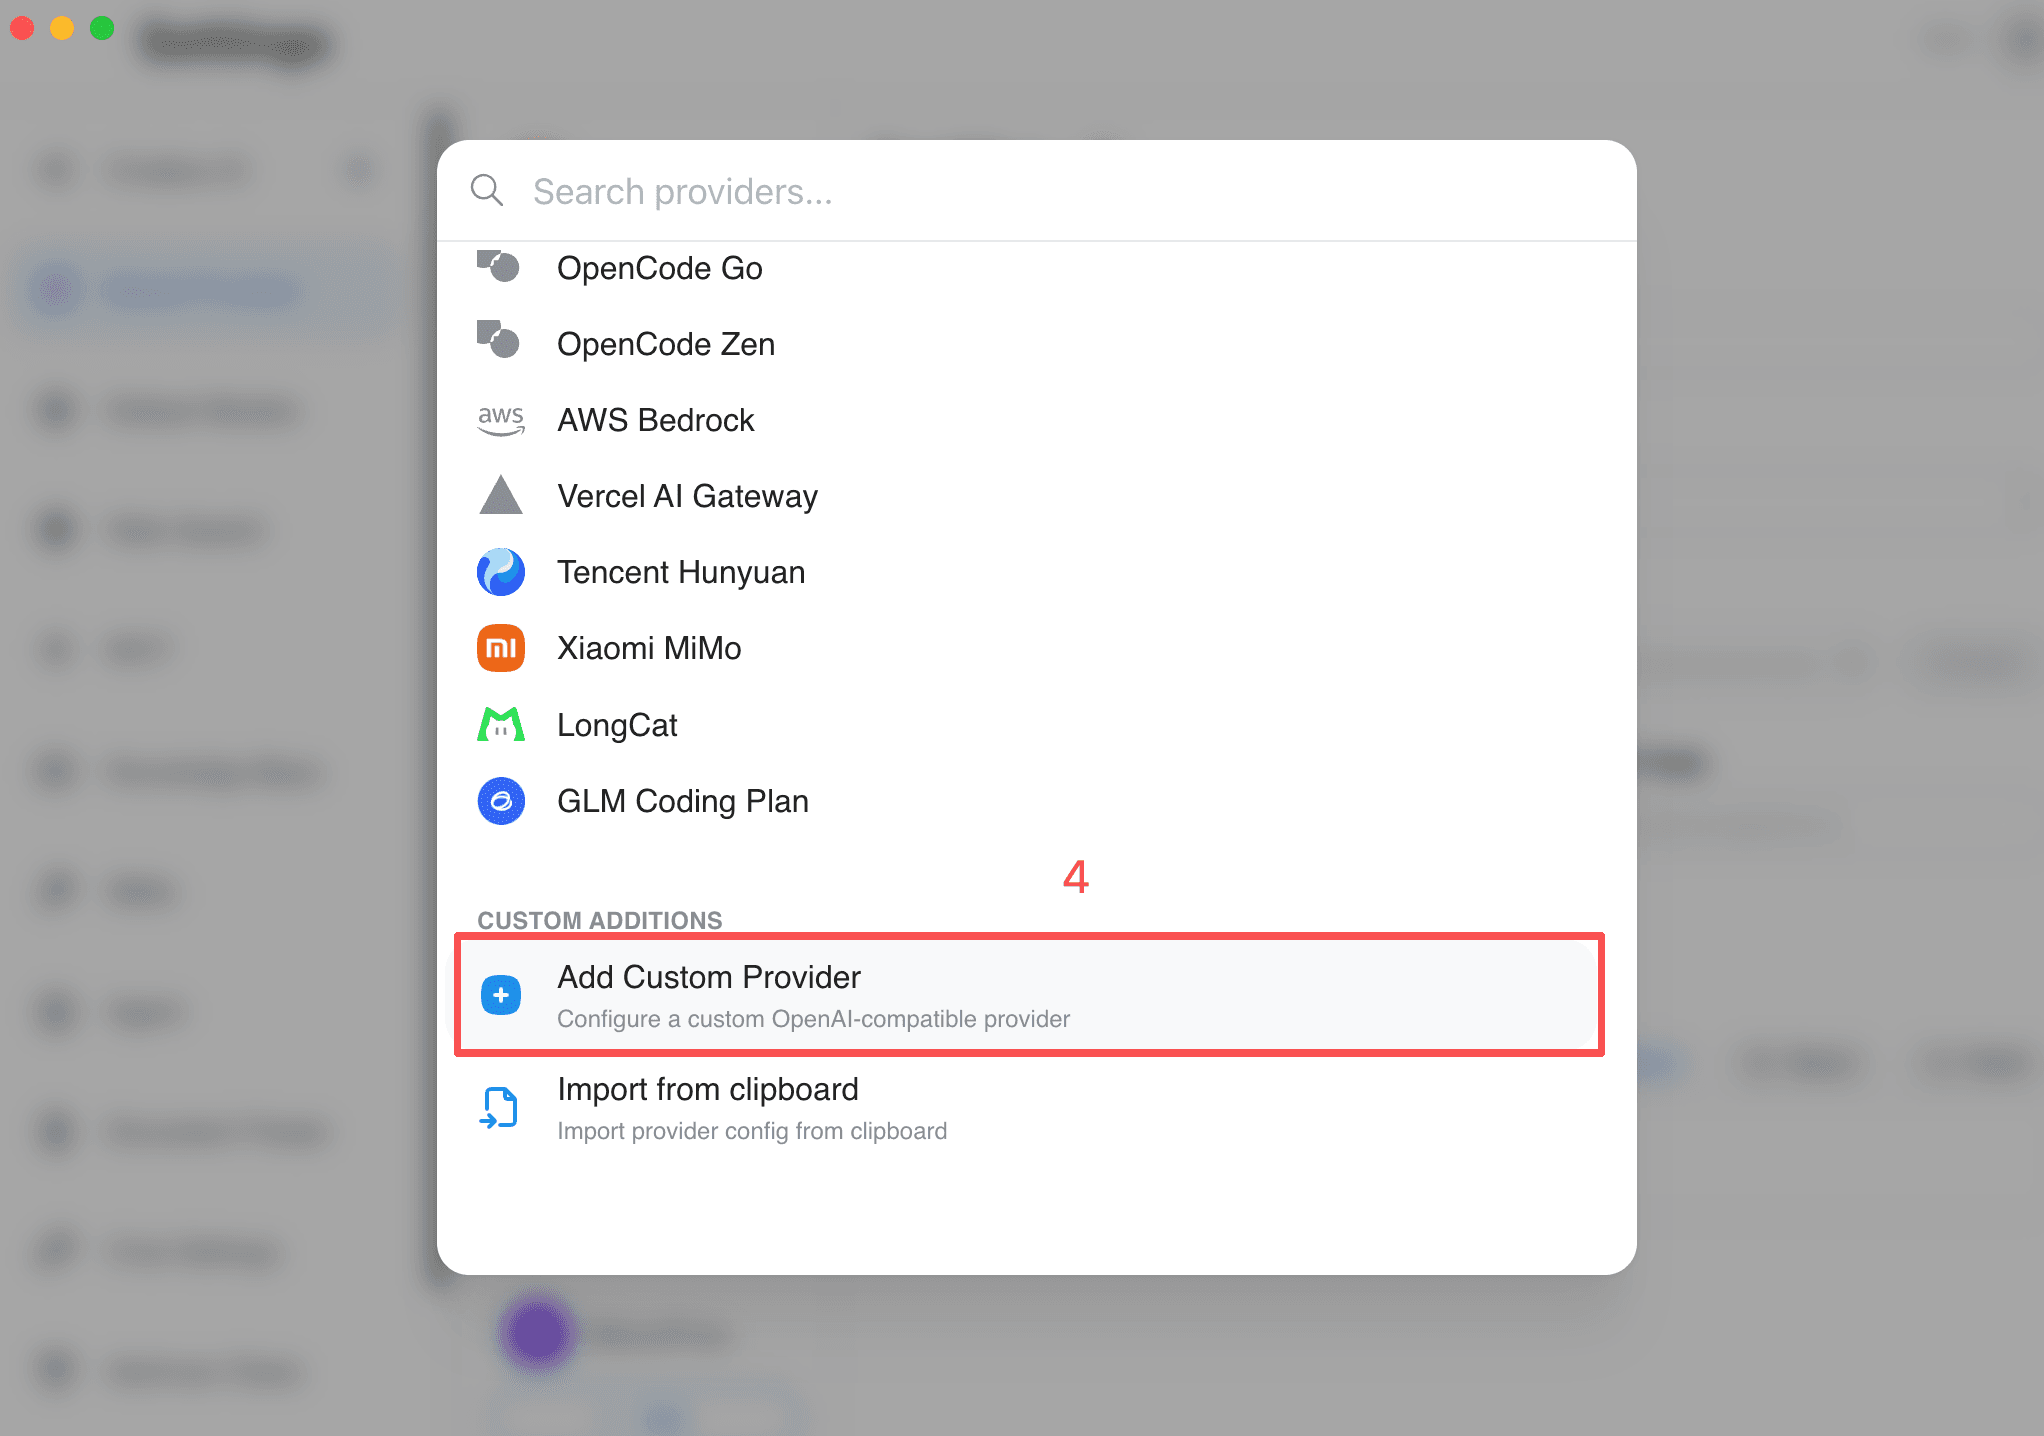
- Select Add Custom Provider.
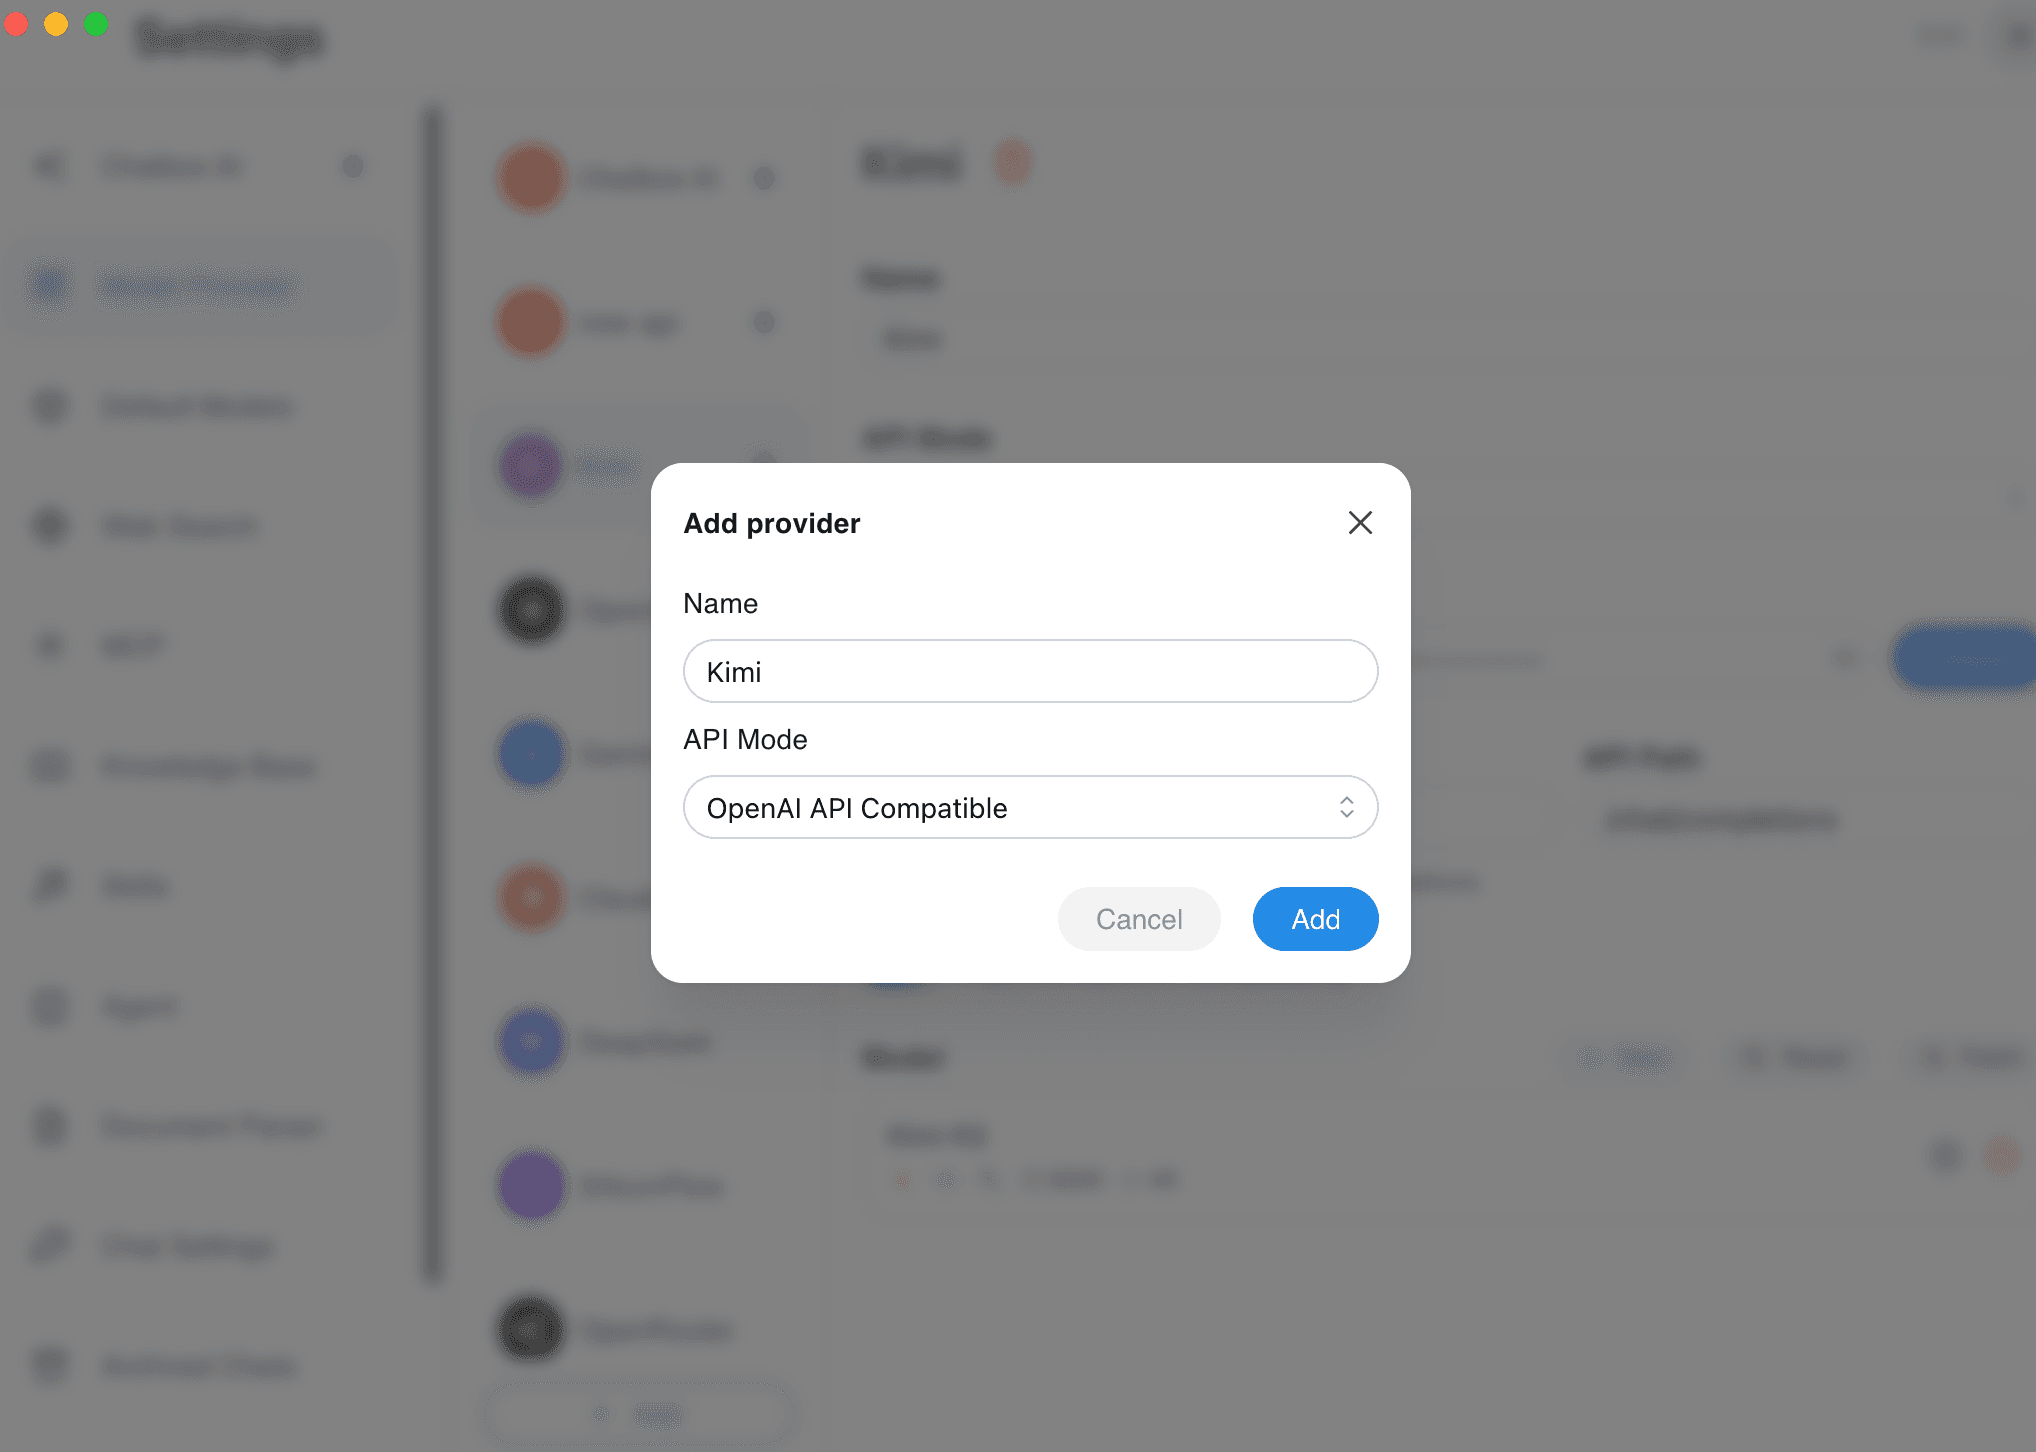
- Enter a name such as
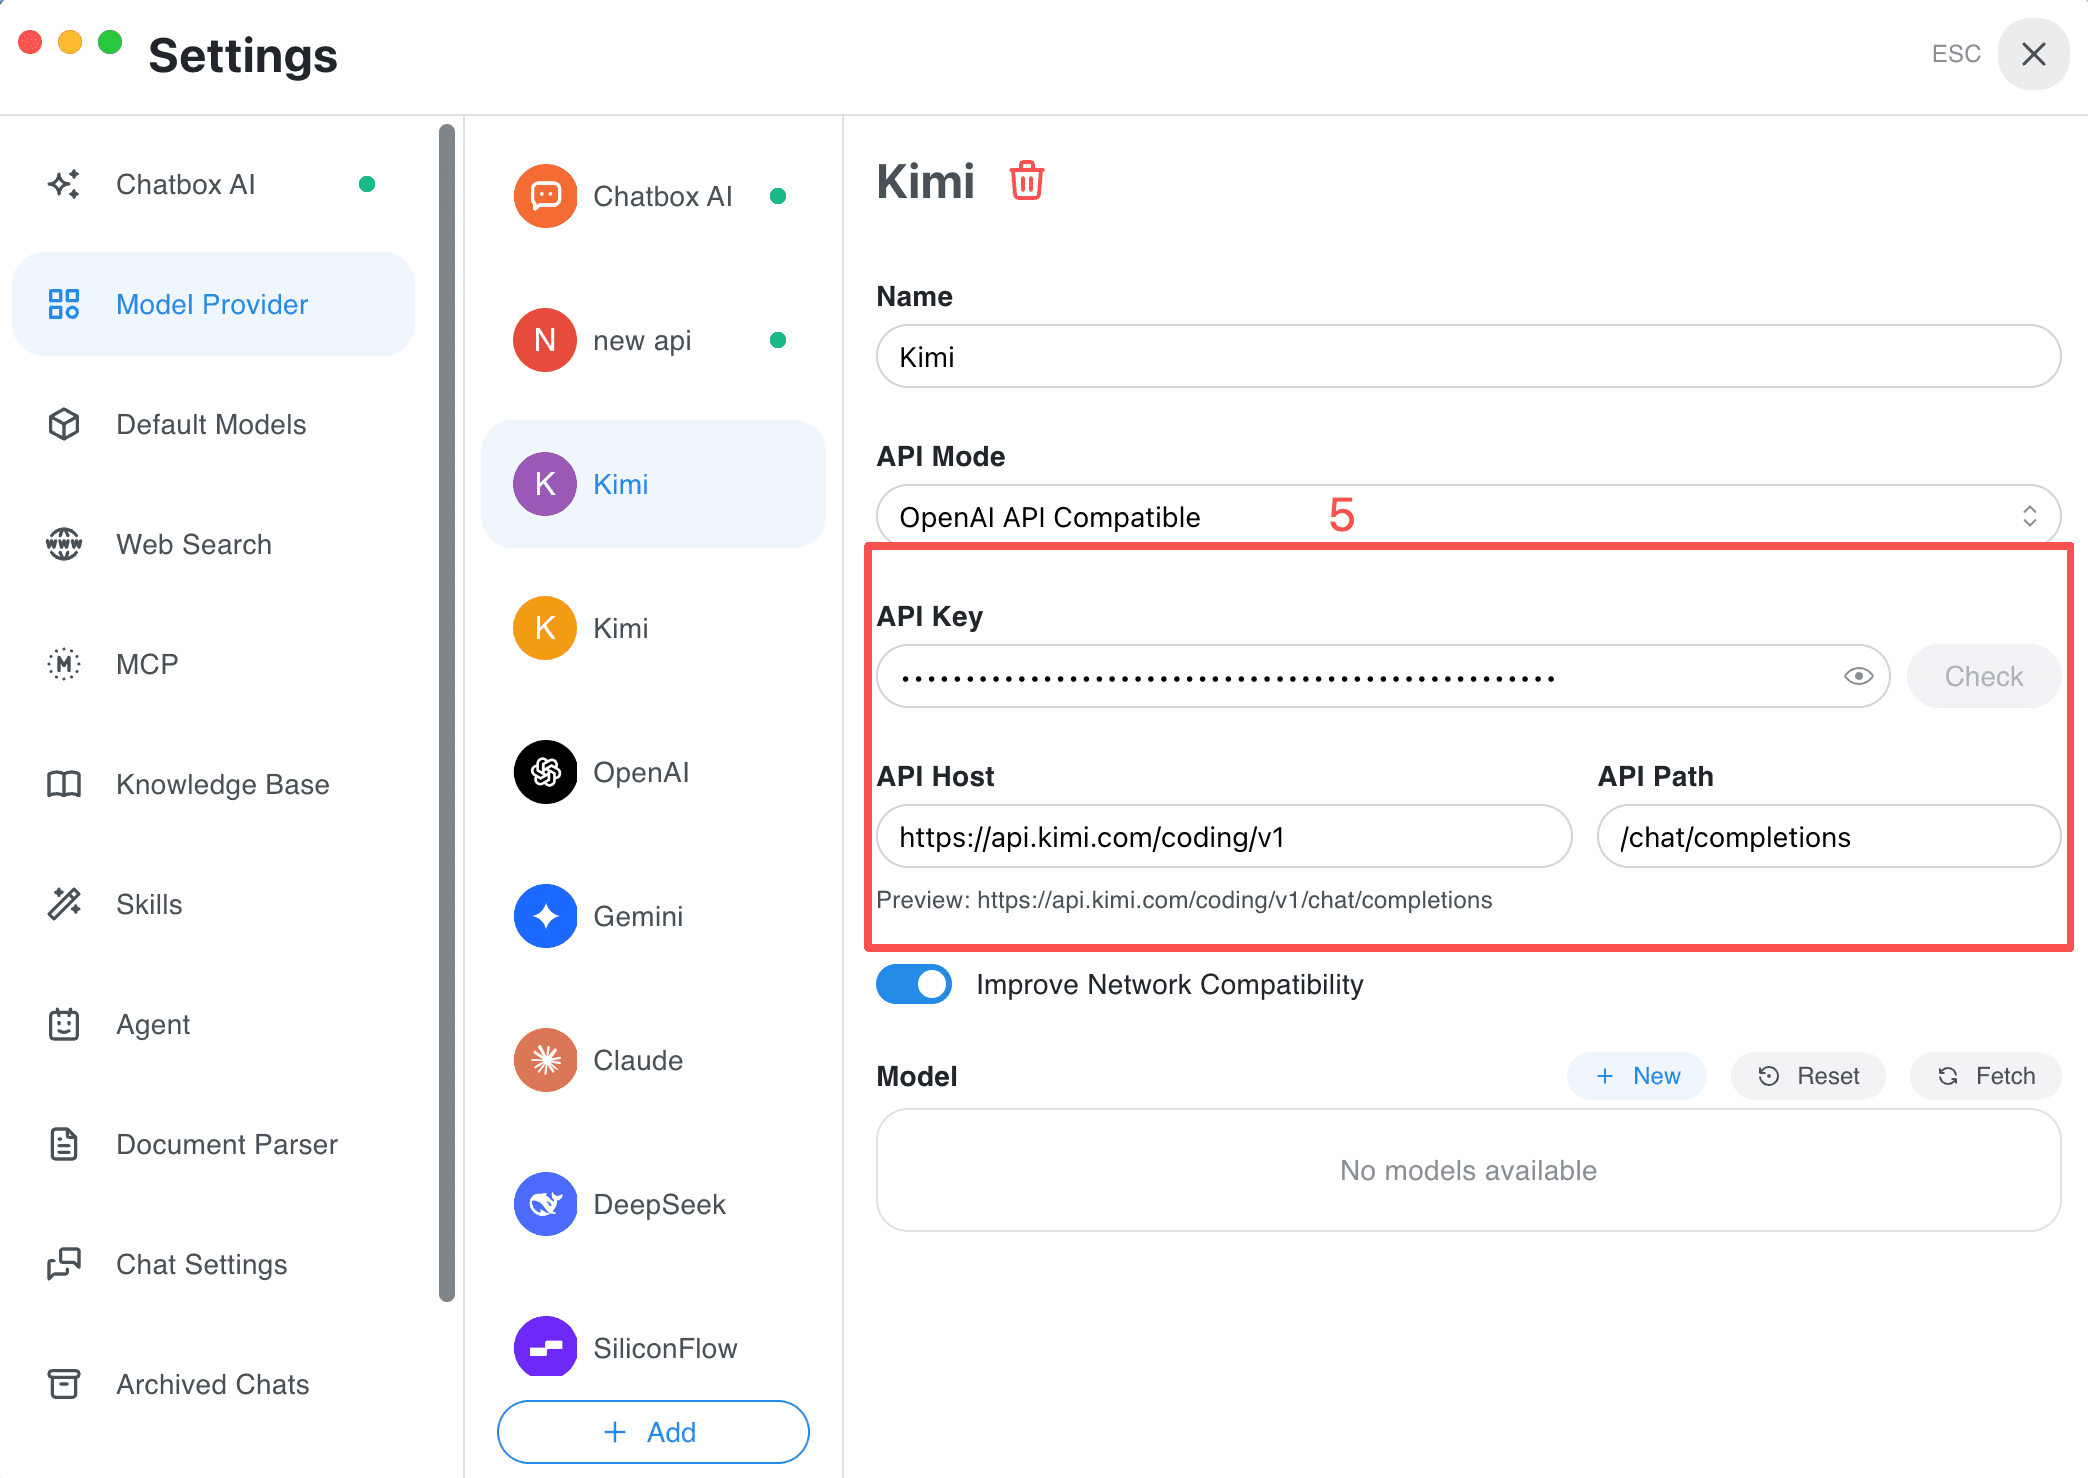
Kimi, and select OpenAI API Compatible as the API mode. - Return to the provider settings and enter:
| Setting | Value |
|---|---|
| API Key | The key created in Kimi Code Console |
| API Host | https://api.kimi.com/coding/v1 |
| API Path | /chat/completions |
Add a Model
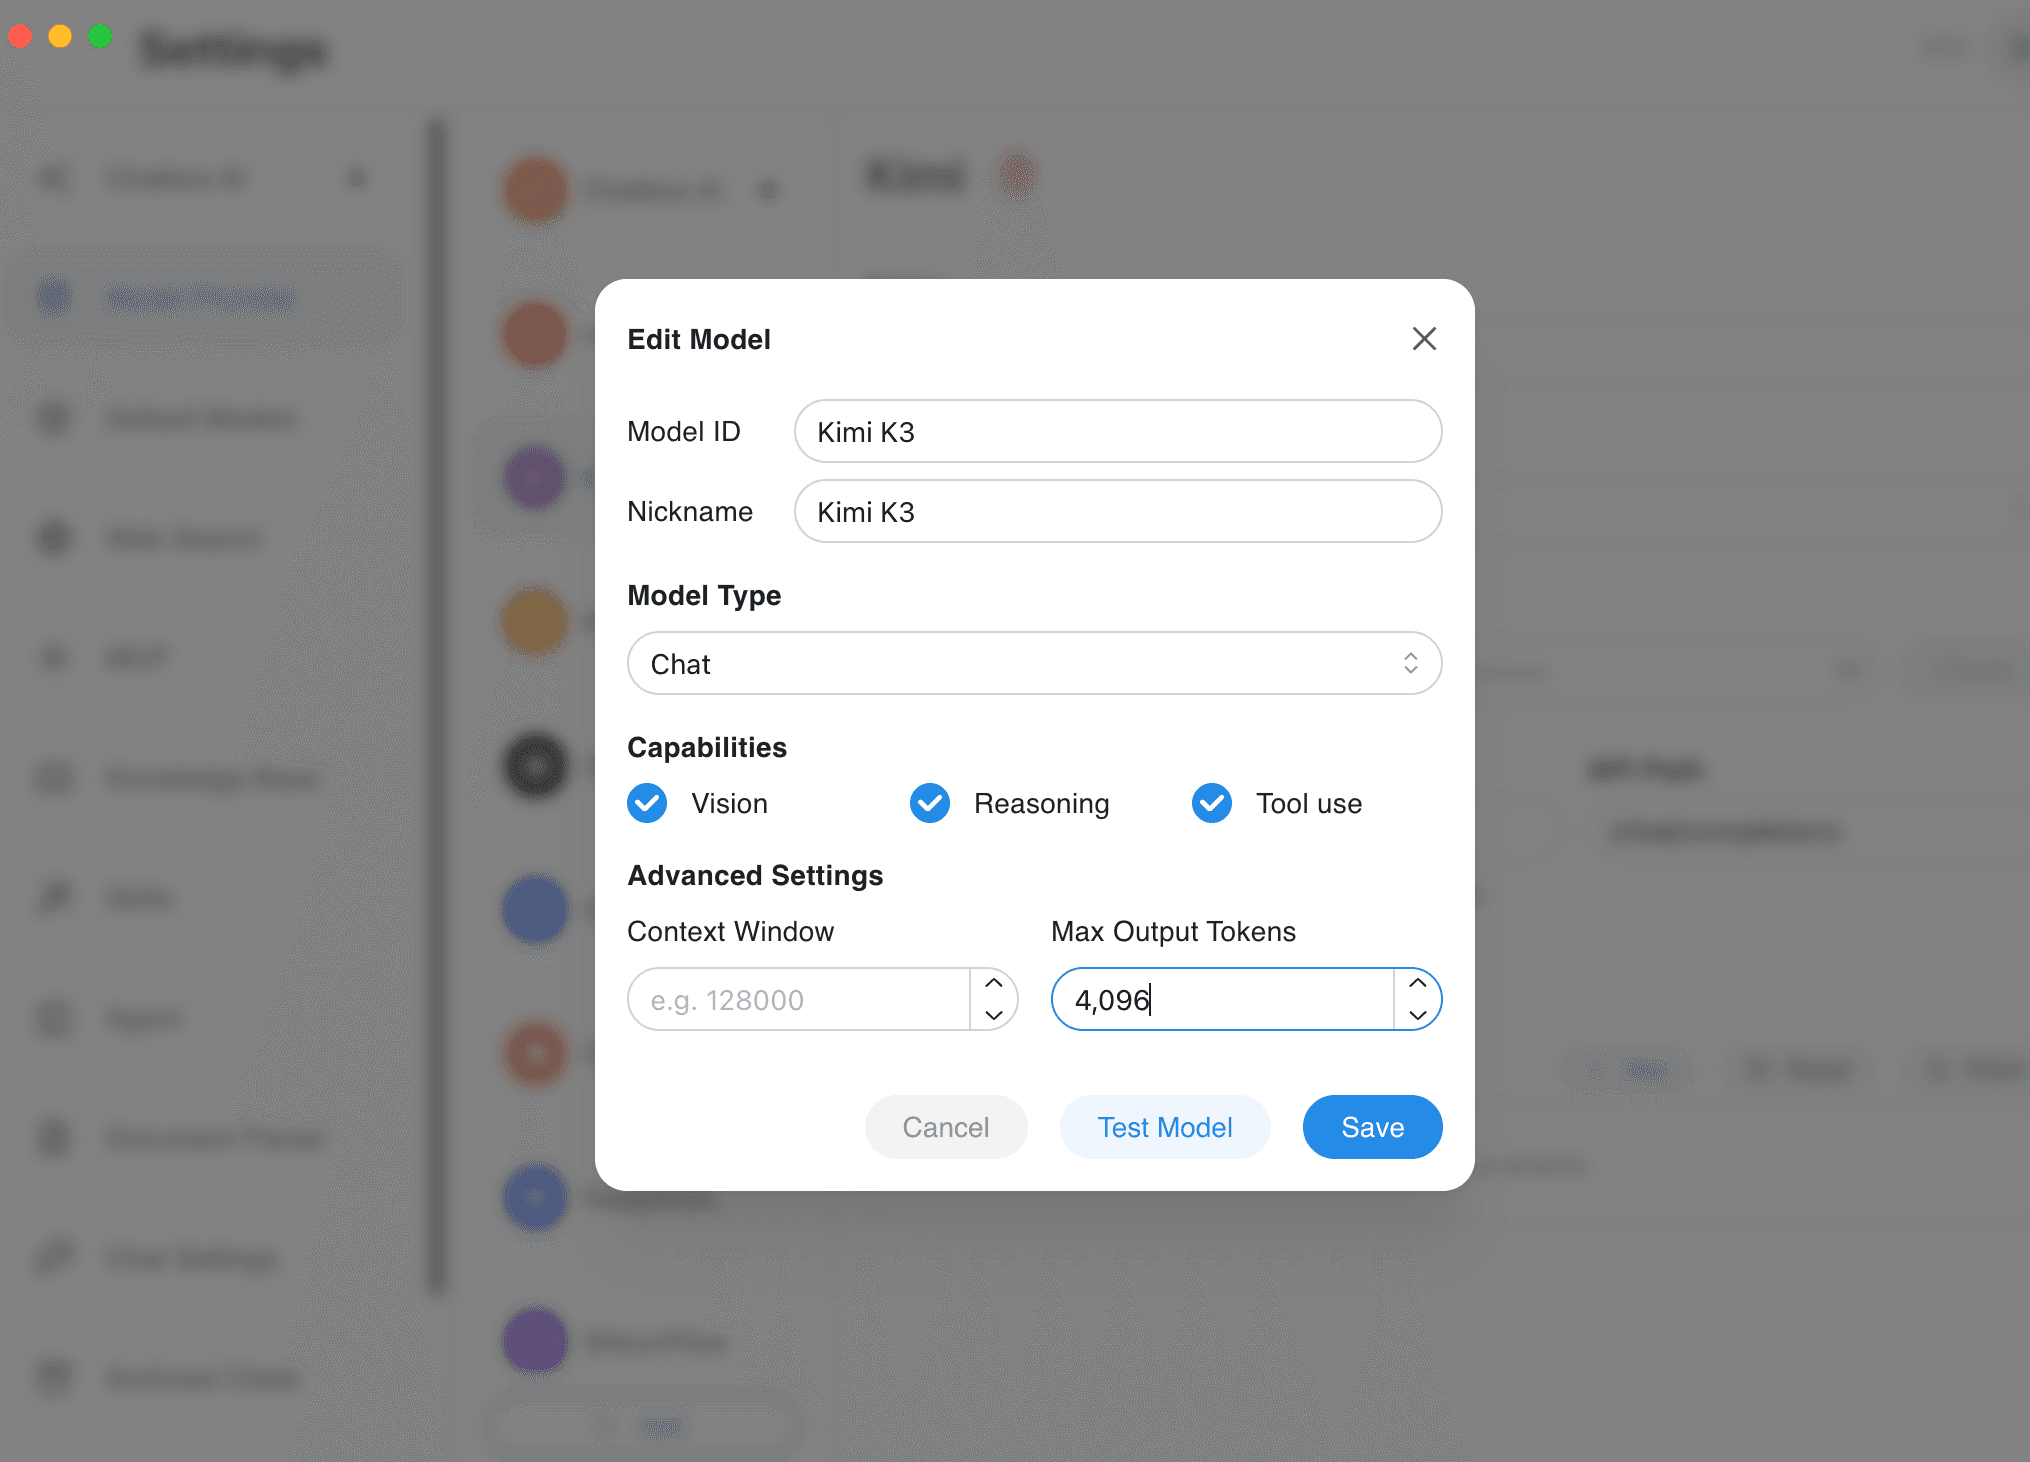
The screenshots illustrate the model editor. Use the exact model ID and limits from your provider console, which may differ from the examples shown.
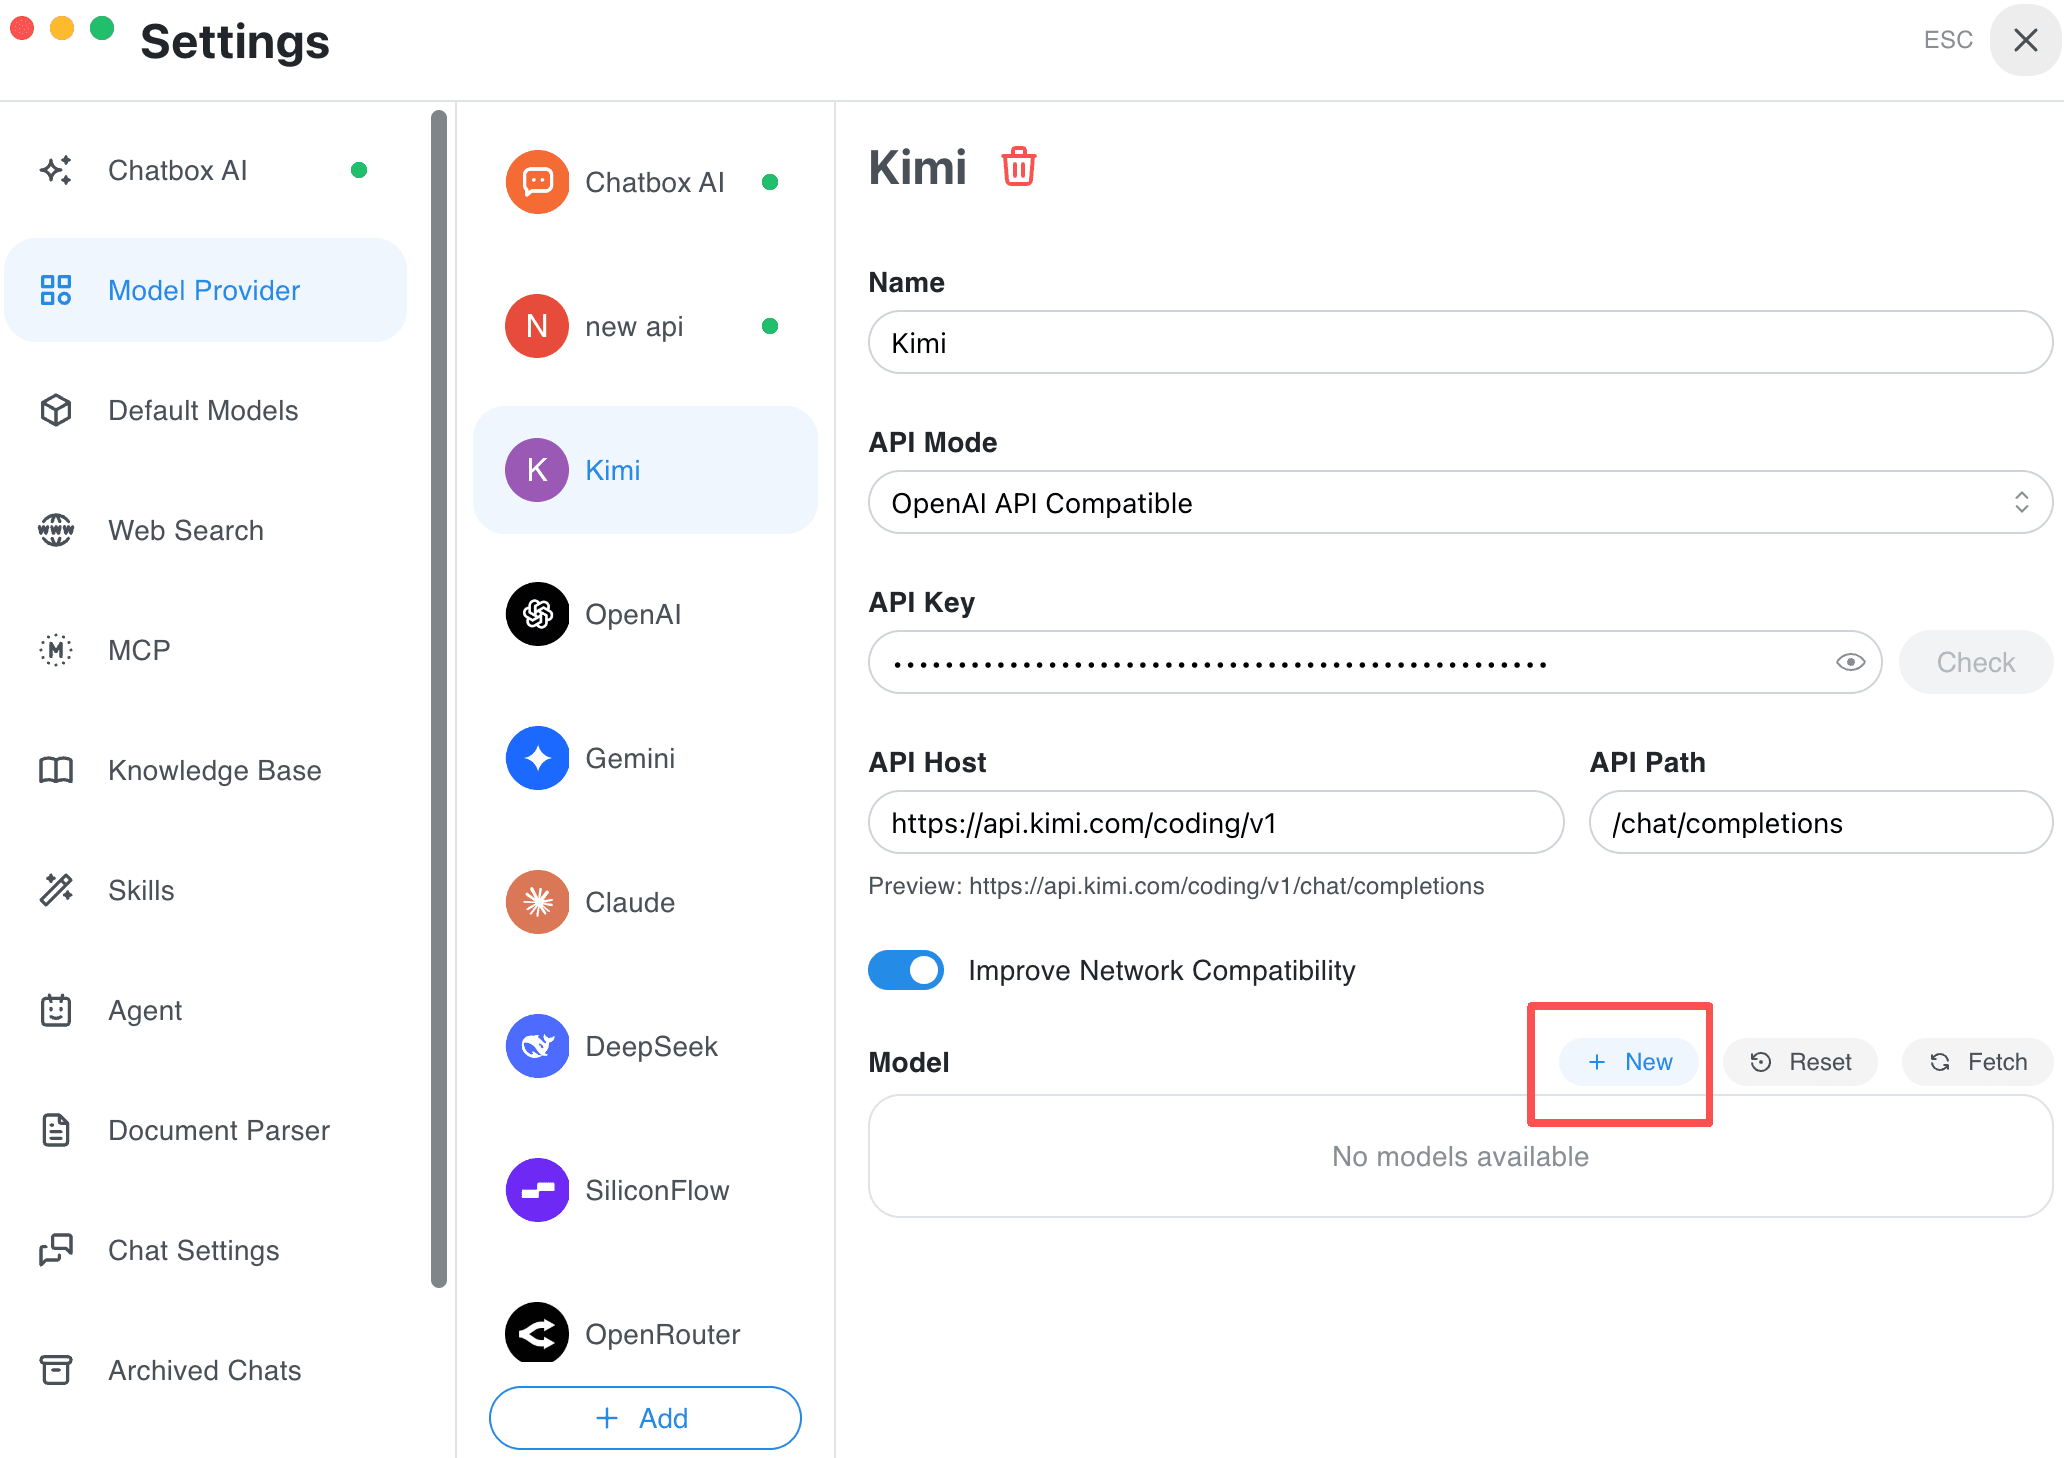
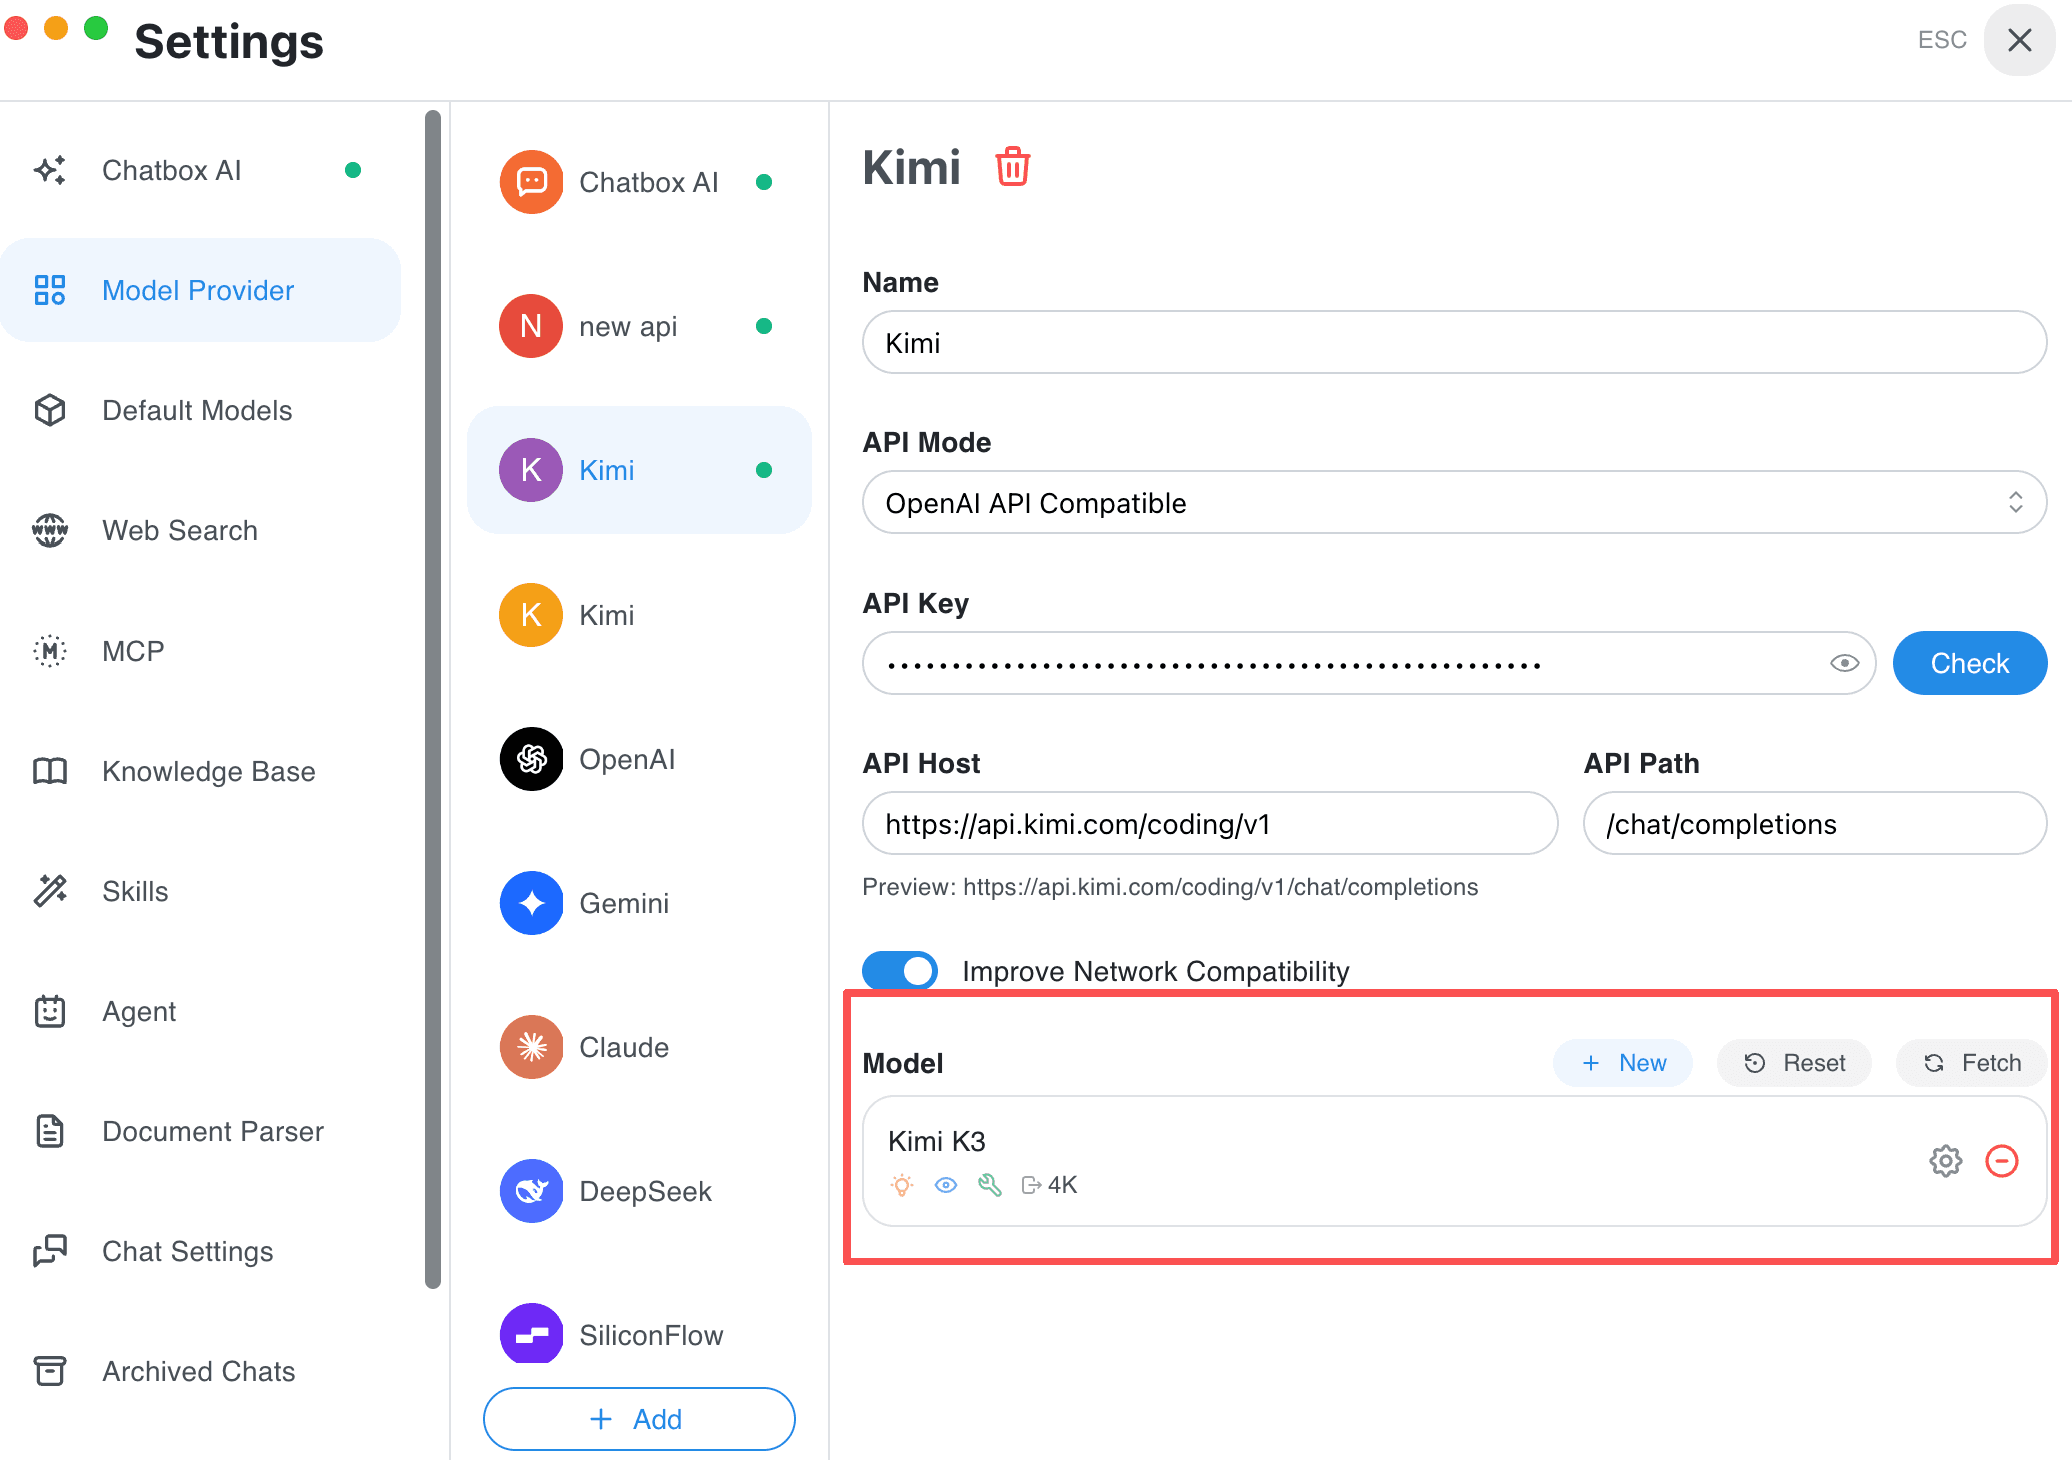
Scroll to Models, click New, and enter the Model ID, Display Name, and Context Window. Copy the exact Model ID and supported context window from the Kimi Code console. Test the model and save it.
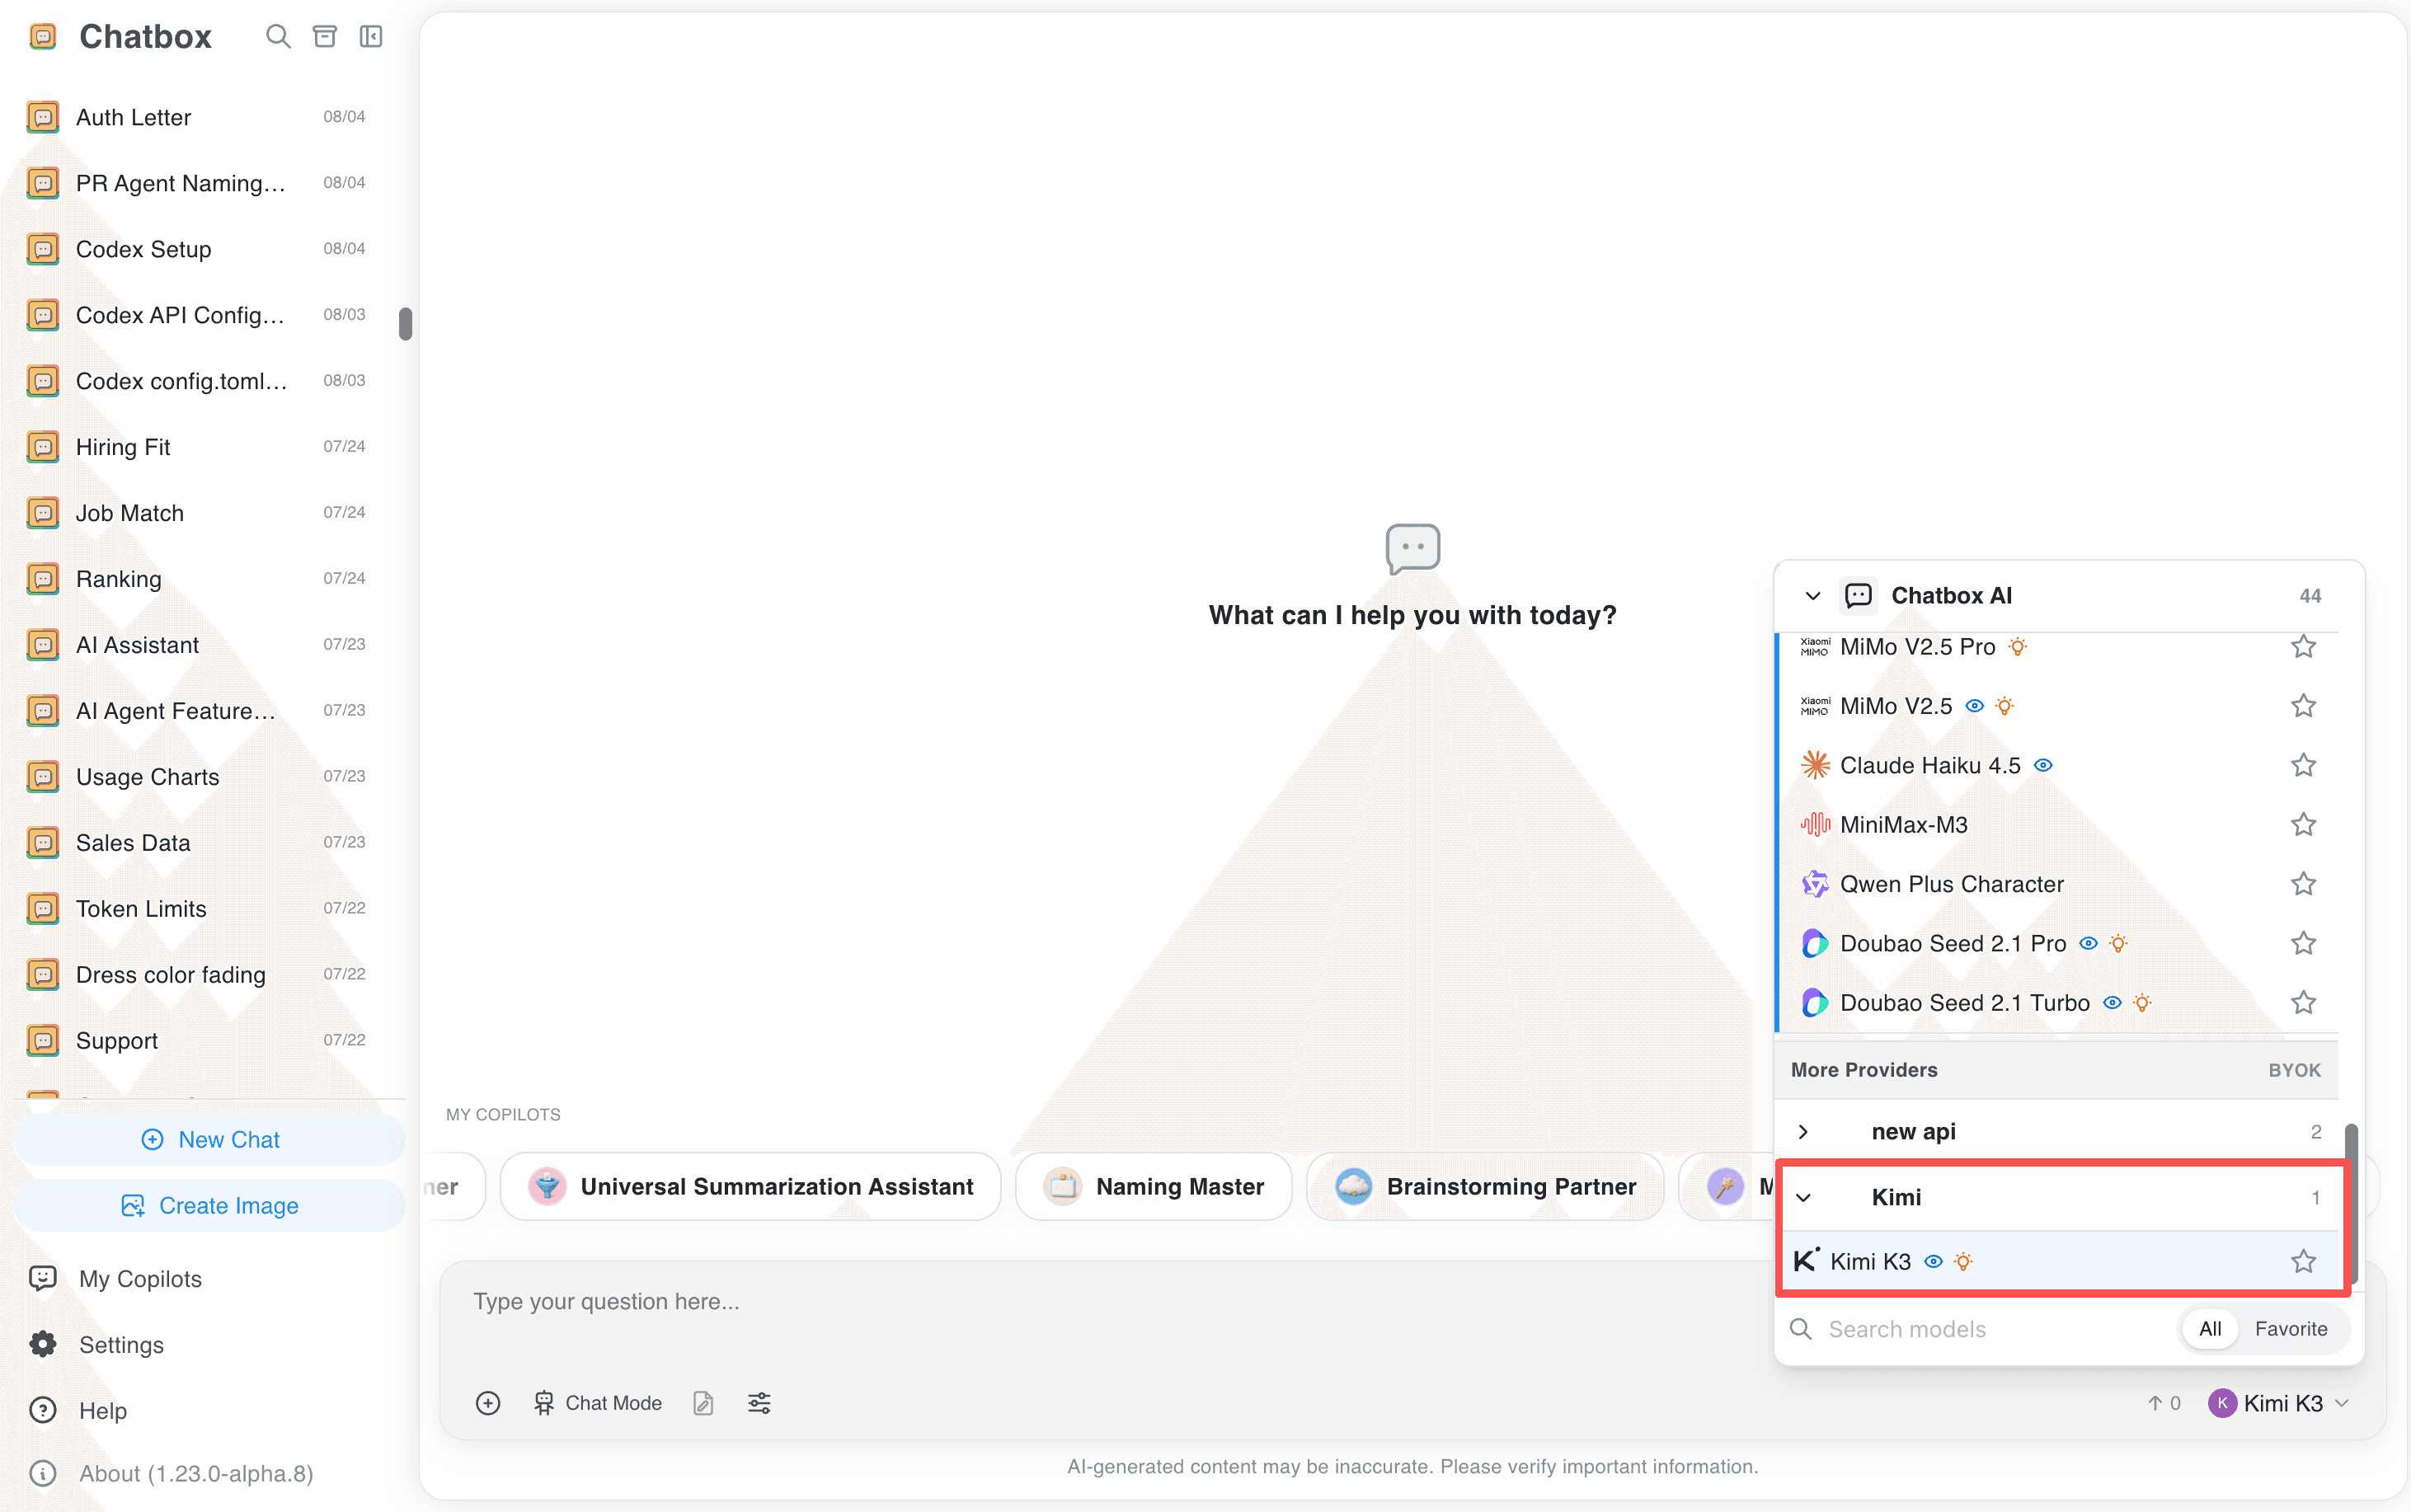
Enable the Kimi For Coding Model
Select the configured model from the model list and send a message to start using it.
Troubleshooting
- For a failed model test, check the API Key,
https://api.kimi.com/coding/v1, network access, and your membership permissions. - For context errors, use the context limit granted to your account and reduce Maximum Output Tokens.
Related guides
All providers · Choose a provider · Connection troubleshooting